- Home
- »
- Games
- »
- Atelier
- »
- Atelier Sophie
- »
- Atelier Sophie – Guide
Table of Contents
First Remarks
This page is intended to be a thorough User Manual on basically every game mechanic and option. It’s mostly spoiler-free, though you will see a things on my screenshots that you won’t get until late game, but I try not to ruin anything explicitly. Keep in mind that all of my terminology about buttons is going to be related to the PS4, though, so if you’re playing on another system, sorry, you’ll have to translate the buttons. I’m not going into anything post-game – I’ll eventually make a different page for that, but that’s too spoiler-heavy for here. Instead, all the mechanics of the game are here – primarily how to fully understand the synthesis system, and how battle, events, and equipment work. If you’re looking for post-game, I can recommend this link in the mean-time.
There’s a surprisingly thorough encyclopedia at the bottom of your game menu during gameplay, definitely make use of it. On almost any page, click the Panel Button to get info on almost any element mentioned on the screen. It has a lot to be desired for searchability, but in addition to basic gameplay concepts, it actually tells you exactly what materials and monsters are on every board in the game (once you see the board for the first time), and what the exact nature of every trait and effect is in the game (once you unlock each once). I won’t list absolutely everything in the encyclopedia, but on the other hand, there’s a lot of details about gameplay that are missing.
However, regarding your Encyclopedia, while looking at anything at all, you can hit Triangle and then Clip to add it to a universal “clipboard” that you can access quickly, at any time (in town or in the field). If there’s some recipes, monsters, locations, or anything else that you want to have at a single button-click, add it there.
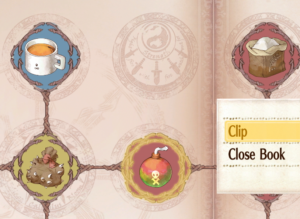 Hit Triangle on the Recipe Hint page Hit Triangle on the Recipe Hint page |
 If you clipped something (see the paper clip?) you can unclip it, too If you clipped something (see the paper clip?) you can unclip it, too |
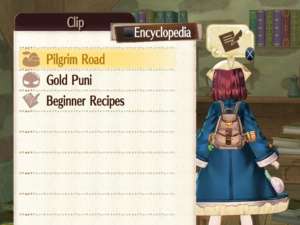 Click R1 while walking around to view the clipboard Click R1 while walking around to view the clipboard |
No idea what any of that means? That’s fine, let’s get started. A few miscellaneous things first:
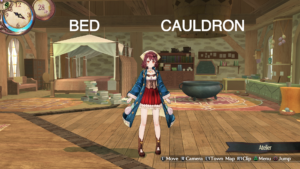
- Talk to your desk to save
- Talk to a Barrel once for a stupidly easy trophy (why? it’s some kind of long-running inside joke)
 |
 |
Time
Unlike almost every other Atelier game, time is basically meaningless. Other than the first of the two missable items I mention on the parent page, time is at most a minor inconvenience. It is important, but you can’t get screwed by it. Moving from one area to another takes time; fighting a battle, alchemy synthesis, walking on the world map, and some events also take time. Merely walking does not (unlike in Atelier Firis).
Many, many events require a certain amount of time to pass in order to hit the next milestone. There are no events (again other than that one) that have an end point in time, but many have daily or weekly triggers, like they’ll only happen on a Monday at dusk. So sometimes you will find yourself sleeping for a while to wait until something happens. Shops also take about a week to restock.
If you hold the confirm/talk button during sleeping or syntheis or world map movement, it moves at double speed; always do this, there’s no reason to not do it.
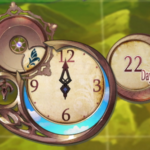
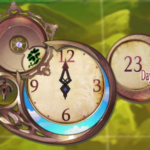
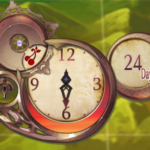
In Atelier Sophie, weeks are 5 days long, and the days of the week are Sprout, Bud, Flower, Fruit, and Seed. The last two, Fruit and Seed, are considered the “weekend”. Also, every month has exactly 30 days, so Seed always falls on a day multiple of 5, which is significant for a secret area later.
 |
 |
 |
 |
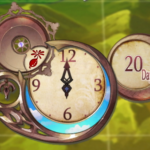 |
And each day has 4 time periods: Day, Dusk, Night, and Dawn (or Day, Evening, Night, Morning, depending on where you read online). Sometimes events only occur during one time period, or sometimes enemies of various sorts only appear at certain times, so it’s good to pay attention and take note.
 |
 |
 |
 |
Movement
This is your usual 3D movement environment, with one joystick for movement and one for the camera. You can change some settings like inverting the axes in the menu -> Settings. While you’re there, you can set the relative volumes of the sounds, and mess with the difficulty or language. I, of course, listen to the audio in Japanese (the text is still all English), but do as you will. Difficulty Normal really is normal, but you can set it to Easy if you’re having trouble with some battles. Set it to Despair for a challenge, or to farm gold.
Each “city” is broken up into areas that magically fit precisely into the circular radar of your minimap. There are zero areas in the game that are larger than that – or, rather, the map just shrinks to fit the circle in slightly larger dungeons.
In order to enter doors or move from one area to another, you must click the talk button. Which means that if you’re running away from a beastie and need to get through an entrance to escape, it’s entirely possible to “smash up against the air” and get caught if you forget to click. This includes exits to the world map.
About half of the “cities” (I’ll call them cities but most are open fields or dungeons) have only one area, a few have a couple, and just two or three have more than 5. You won’t run into one for a very long time, other than the main town of Kirchen Bell. However, for Kirchen Bell alone, you get a warp ability to jump anywhere. It takes just as much time as walking, so sometimes it’s dark by the time you get to the other side of town, even if you teleport.
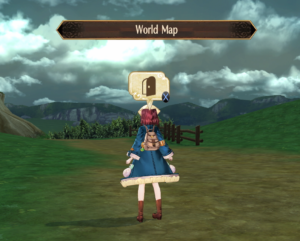
On the world map, you can either click an area to move there, or hit the D-pad to take a N/E/S/W direction from where you are at the moment. Click to enter a town, including home, in which case you instantly teleport to your Atelier.
Inventory
Inventory is pretty simple in this game, though it does have some powerful searching and filtering that I’ll get into later on in the Synthesis section (because that’s where it’s useful). However, one thing is not explained well, and that’s the difference between what is accessible in town vs not in town. In town, you have a menu item called Container, and it contains everything. Every single thing in your ownership, and you can search or sort or whatever on everything:
 |
 |
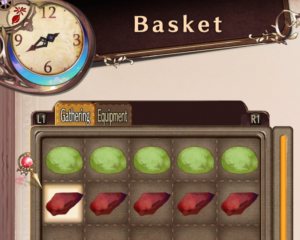
And that’s true for anywhere in Kirchen Bell, not just your Atelier. You can see everything, equip or de-equip everything. However, anywhere outside of Kirchen Bell, whether it’s the World Map or any other area, you have much more limited options. The menu becomes “Basket”, and you can only access what you literally armed everyone with (even items are armed, see the Equipment and Items section), plus things you’ve gathered. You can’t access anything else.
 |
 |
 |
Events
The game is basically a series of intertwined event trees, and the “main plot” is really only one or several among a large number. Each named character, PC or NPC, basically has their own event tree. There’s an event option in the menu – check it often to see what you need to do next for each open event. Sometimes there are multiple boxes to check, before an event will move forwards.
However, that being said, it doesn’t tell you all the triggers for the next event, nor does it tell you how to get a new event tree started. There are basically a few things you can do that will always move the plot forwards, or find a new available event; cycle through them periodically, if you don’t know what to do and it’s not listed specifically in the event menu:
- Time must pass – never more than a week, so if you sleep a week and nothing happens, then there’s no time trigger that you’re hung up on
- Enter and leave the Atelier
- Synthesize something – literally some events don’t trigger unless you’re mid-synthesis
- Synthesize a specific something – so make sure to make at least one of everything
- Perform a repetitive action that you need to make progress on, like playing the piano
- Beat a specific monster or collect a certain amount of a material
- Follow the instructions in a Rumor (see Rumor section)
- Advance your Friendship level with someone (see Friendship section)
- Talk to someone at a specific time and place
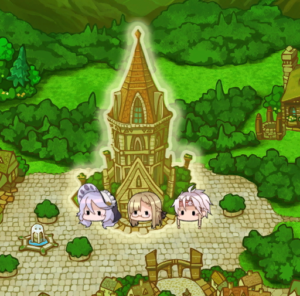
The last one is critical. All PCs and NPCs have lives, and they move around the city and sleep. Now, they don’t move much – they’re usually plastered exactly where they usually are, waiting patiently for you, the center of their universe, to grace them with your presence. However, sometimes they’re elsewhere. 80% of the time, you can catch this by checking the Kirchen Bell warp map. The little face icons show you where people are, and if one of them is in a weird location, that means you need to go talk to them for an event. The thing is – these changes of location are based on the day of the week and the time of day. So sometimes someone will only be out of place in the Morning on Tuesdays. Usually events for a person happen all day long and “either every weekday or every weekend day”, but a few of them are more localized.
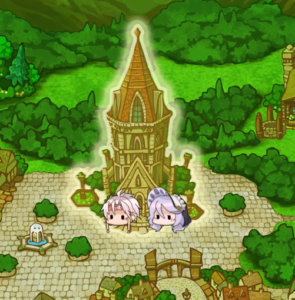
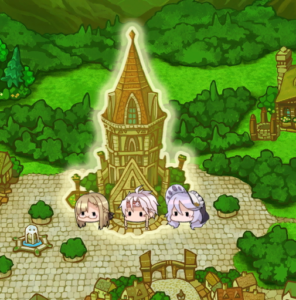
For example, on Weekdays, the Plaza and Church have usually two people there: Pamela and Julio. On the weekend, Monica is also there. If you go there on either a weekend or weekday, though, you’ll see the front of the Church empty. (People are in that area but not directly in front of the Church, usually).
 |
 |
 |
However, if you happen to notice a person in a different location, or even in a different order in the same location, then something is going on. There’s definitely an event happening, so go there and check it out! In this example, Pamela (the purple hair) is out of order!
 Normal weekend positioning Normal weekend positioning |
 NOT NORMAL positioning! Event! NOT NORMAL positioning! Event! |
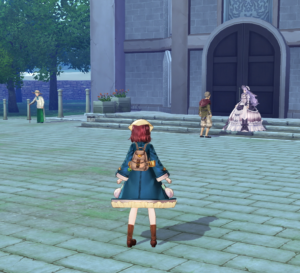 Sure enough, something going on, check it out… Sure enough, something going on, check it out… |
 Event! Event! |
However, some events involve NPCs, and they are not shown on the map, like the Fortune Teller likes to sit by the waterside in the evening – during which time, talking to her triggers an event. So every once in a while, walk the town once at night and once during the day, once each during a weekday and during a weekend day, and check for out-of-place NPCs. And some events are with people in their normal place. So when it comes down to it, talk to every major character once per week on both a weekday and weekend, and be on the lookout for out of place PCs or NPCs. That covers 95% of talk-triggered events.
There’s a full list of all events on the Chart Page.
Synthesis
Getting Recipes
You’ll be spending easily 2/3 of the game at your Alchemy cauldron shoving square tetris blocks into round holes, so best get used to the system. It is not explained well in the game, unfortunately. Here’s what you need to know.
First, you can’t make something until you know (or have just invented) the recipe. So a good portion of the game is finding the inspiration for a new recipe, which usually amounts to finding a specific location in town or in another area, beating a certain monster, collecting a new material, or some such thing. Some are a little unexpected like you need to die once and just barely survive once for two recipes. But most of them happen if you:
- Collect a couple of everything in each new area
- Kill a couple of each new monster, but don’t get yourself killed early on trying this on everything, there’s nothing critical that you need early that requires fighting anything actually dangerous
- Advance the plotlines with events
- Synthesize each recipe at least once, and try to get one of each level of effect on each as well (like making sure to make a snack that has a Salty effect – see below for an explanation of Effects)
- Follow the instructions in a Rumor (see Rumor section)
- Keep synthesizing anything at all for a while, sometimes your level, or the amount of time spent synthesizing is part of moving forwards
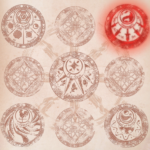
As you find things, you’ll fill out your pages of recipes in your book. There are eventually 5 full pages. When the slots on the Recipe Hints are blank, you haven’t figured it out yet, when it has a silhouette you know the recipe but haven’t tried it yet, and when it’s a full-color icon you have succeeded at making it at least once.
 |
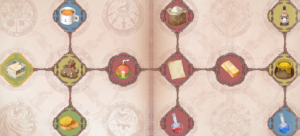 |
As you find new recipes and unlock them, the recipes next to them in your book then open up. They’re not immediately available, but you can click on them for a clue as to what you need to do in order to unlock them – a full list of answers is available in the Recipe Ideas section of the Chart Page.
Each time you make a new item for the first time, all the “slots” in the recipe book that are directly next to it become question marks, and get clues as to how to unlock them.
In the below image, the “padlock” ones on each brand new page of recipes (there will be 5 pages eventually but you only start with one), always appear first. You can’t make that item yet, but it gives clues in green as to what you can do to unlock it. In this case, either get further into an event chain, killing a few monsters, or by completing a few Requests from Horst.
Recipe Ingredients
As to the actual process of making items, there are a number of stats that are separate from each other – you’ll need to become acquainted with all of them:
- The material or synthesized item itself
- Traits – these are things that can be transferred from one item to another
- Effects – these are abilities that pop up on a completed item if you “do a good job” making it, but cannot be transferred
- Quality – increases the effectiveness of traits and effects, but only in late-game
- Value – I don’t mean money value here, it’s a number that has to do with how “strong” the material is when it’s used in the creation process
- Color – this and value play off each other in the creation process
- Size – this also affects the creation process
- Category – when making an item, it has a certain recipe, it needs one of this and two of that – the “this” and “that” in the recipe are usually categories, so like “clay”, meaning any clay you make or any clay you find, or “gem”, as in any gem you make or any gem you find
- Quantity – the number you get every time you do one synthesis
Of all of them, you can more or less ignore quality at the beginning of the game. It’s not going to affect anything until you have way more complex needs later in the game, and the difference between grade-E and grade-D is negligible. It’s only when you can start maxing out quality that it starts making weapons and items noticeably better.
You might say that half of the purpose of the game is at some level to create items with particular Traits and Effects on them. Those are the only things that affect how the item is used and what it does – the rest affect the creation process itself.
Basic Synthesis
Setting aside making good items, how about just making an item, period? Let’s start there. Walk up to the Cauldron and “talk” to it to initiate crafting something. You won’t see all the recipes that you see here, because I’m writing this FAQ using a fairly maxed-out end-game character with all the items and levels and recipes. However, here are the important things:
- On the left page, Berg Medicine is the name of the thing we’re selecting to make
- Where it says 42 here it will probably say zero for you, because that’s the number of them that I’ve made
- The tabs on top are a way of filtering recipes a bit – ALL means every single recipe, Recovery means just healing items
- On the right page, a bunch of stuff, but let’s focus just on one area: Material
- “Magic Grass”, “(Animal)”, and “(Water)”
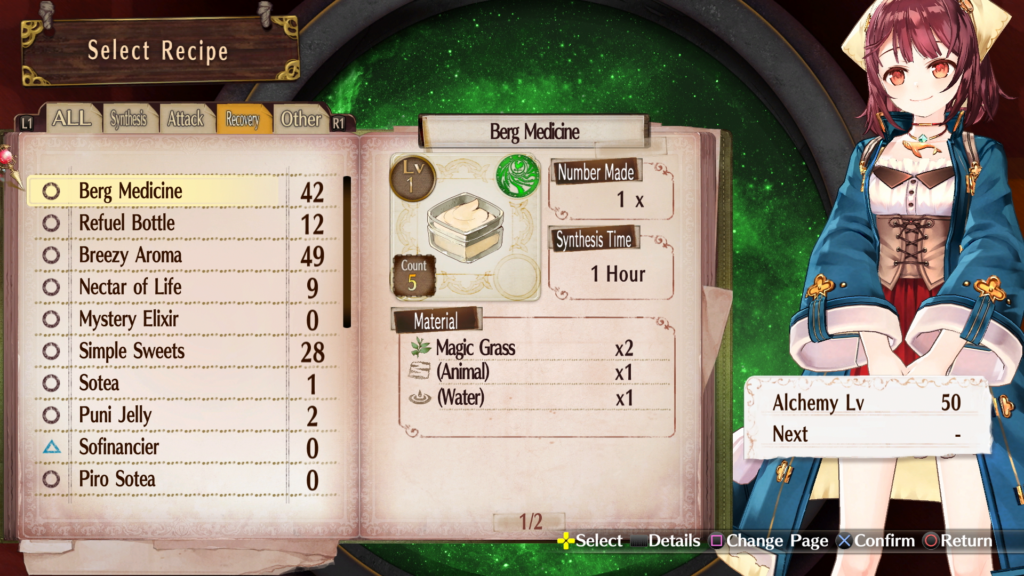
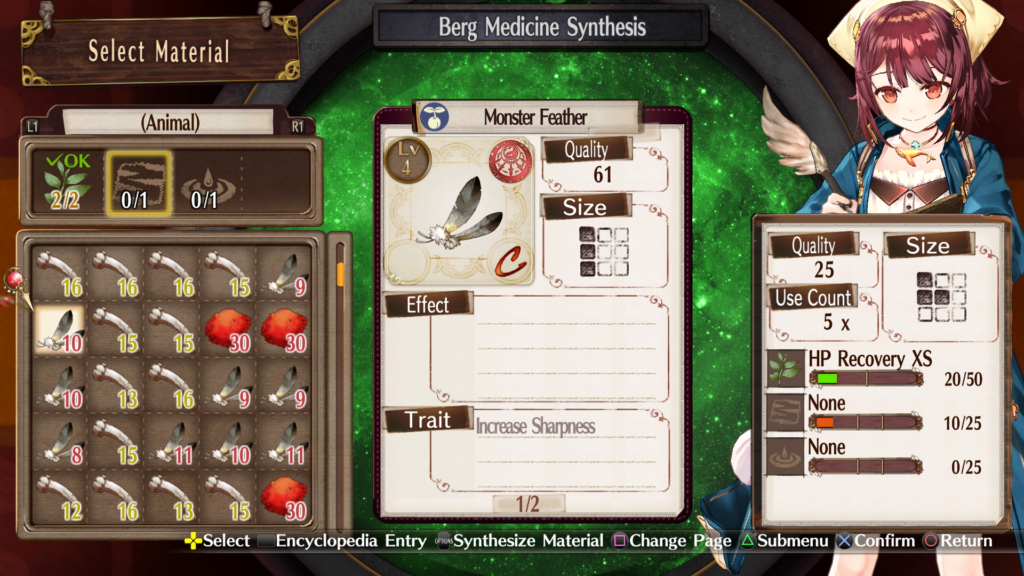
Select Berg Medicine and we enter the next screen, below this text. For now, ignore everything but the leftmost third. The three tabs correspond to the Materials from the previous screen. I.e. the green plant with OK on it corresponds to “Magic Grass”, the highlighted thing to “(Animal)”, and the last thing to “(Water)”.
Important note: when things are in parentheses, like (Animal), it means that anything of “that category” will do, any “counts as animal” material, like bones, feathers, meat, fur, etc. Likewise (Water) means that anything that “counts as water” will do, stuff like literally water, milk, or things that you make that are water-like. The only things it lets you select are the things that are correct. However, things that don’t have parentheses, like “Magic Grass”, can only be filled by that very specific item or material. Those recipes are a lot harder to maximize, because you have less choice. But none of that affects us right now.
Basically, as long as you select anything at all (assuming it doesn’t say anything ominous about you not being high enough level, which is not the case for now), the recipe will “succeed”, and that’s all we’re worrying about for now. More complex stuff in the next few subsections. So select two of the first thing, and one each of the other things – anything will do. When it says if it’s ok, click yes.
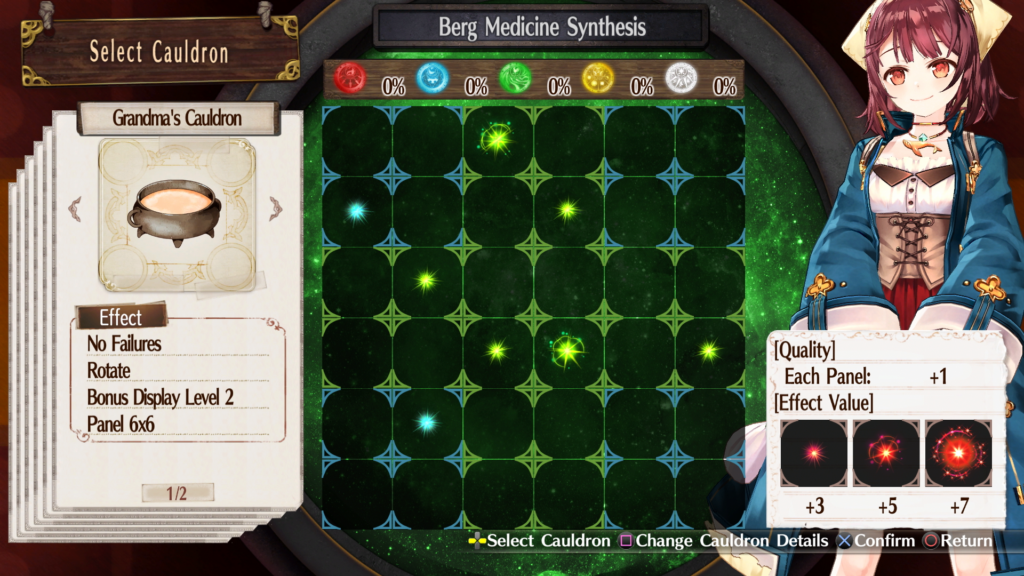
Here we select which Cauldron to use. Yes, there will be others later in the game, and yours won’t have the same words under it that this one has, because you haven’t upgraded it yet. We’ll get there. Just select Grandma’s Cauldron and don’t worry about it. Also, your grid may be a 4×4 instead of a 6×6. Again, we’ll worry about that another time.
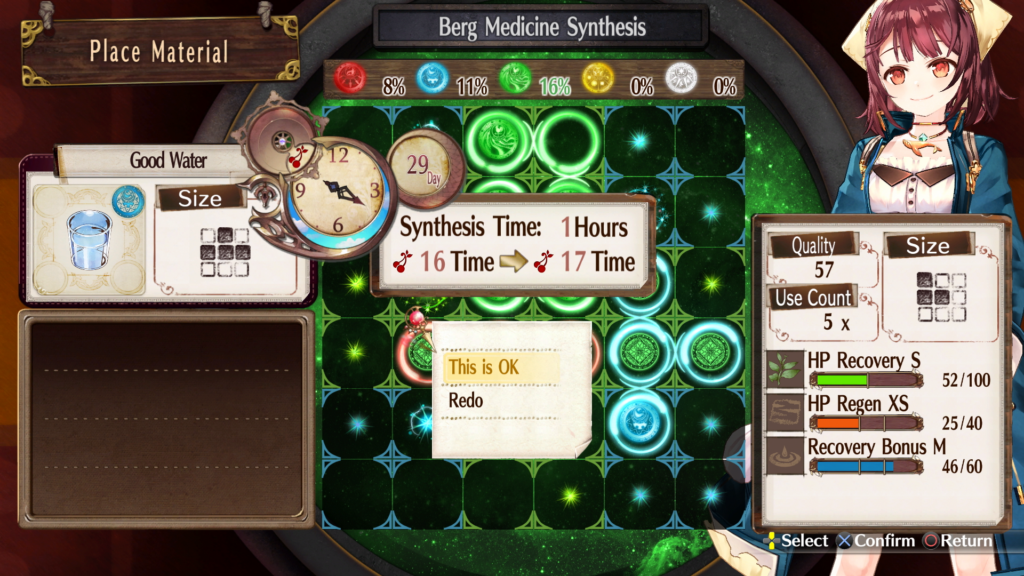
If you don’t care about the Traits or Effects, then frankly, it doesn’t even matter what you do here, you can’t possibly mess up your first Berg Medicine, so don’t worry about it. When you select one of the 4 materials from the left, it will turn into a tetris-looking-block in the middle, and you get to place it.
Do note that the exact shape of the tetris piece was on the material all along, like this one here is a 3×1 piece, but we don’t care for now. Also note that you can move but can’t flip or rotate the piece. Yes, my red thing here is on it’s side and you can’t make yours do that. You will eventually get the ability to do this, just keep it in mind for now and place stuff. Even if things overlap, it’s fine for now.
One last basic feature mention is that when you’re highlighting a material and about to select it to place it, you can click L1 to swap it out with another material in the same line. This means you do not have to cancel out and go completely to the ingredient-selection screen if you just want to find something with a different shape or something.
However, for now, place the last ingredient, and…

…a bunch of things went on. Colored bars shifted, stars blinked, numbers updated. It’s all very confusing. Ignore everything, it’s fine. You don’t care for now, we’ll go over it all eventually. Click “This is OK” because everything is going to be okay, I promise.
Congrats! You made something, this is the result. It has a certain quality and size and effects and traits, but we don’t care what those mean yet.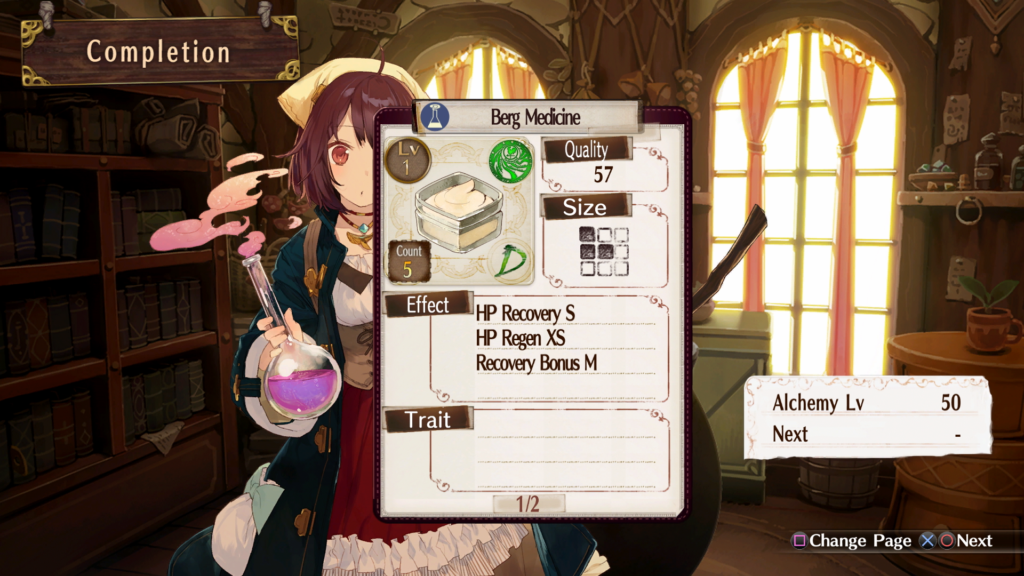
Traits
Now it’s time to transfer and combine some traits. What this means is that all materials you find have some particular magical property, and when we mix materials together to form something new, we can keep some of those properties (Traits) and transfer them to the end-result item. Note that you won’t be able to transfer a Trait until you hit Alchemy Level 10, then 2 at a time at 20, and 3 at 30. Three at a time is the maximum.
We’re still not going to be bothering with any other issues with synthesis, like maximizing Effects, which has to do with color, shape, value, and all those bars and numbers on the synthesis screen. This is simpler to understand, so we’ll do this first. It’s also possibly the more important thing, as you really need to find good traits and transfer them to things in order to make useful equipment.
So for now, we’ll make an Uni Bag. You’ll learn the recipe if you find at least one Uni. Yes, Uni are those underwater bottom-feeder things that look like spiky balls, that people crack open and eat their slimy orange egg sacs as sushi. Which are delicious, by the way. So, of course, in the world of Atelier, they grow like fruit and you find them lying on the ground, stinking in the sun, and pick them up to eat. O.o Of course. 😛 Gross. Anyways, either find an Uni (to unlock the recipe) and play along, or just read along to get the general idea. You might not actually have materials with the precise same traits as I do here, though.

With that, I’ve decided that I want a Critical+ and Destruction Up+ on my Uni Bag, plus a regular Critical just for shits and giggles (and to prove a point later). For that, I need materials that have those traits on them that happen to be the ingredients needed for the item I want to create. Luckily, I do have them.
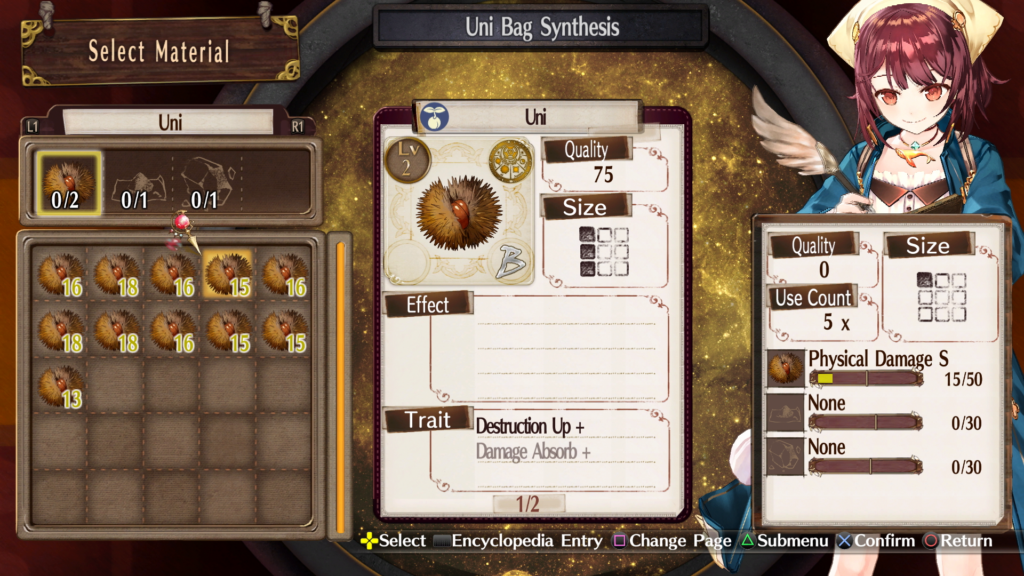
So, I select a material with Destruction Up+ on it – notice it under Trait in the bottom middle of the screen, below. Also note that it is dark, and “Damage Absorb+” is gray. This means that Damage Absorb+ is not a thing that will stick on this particular item, no matter what you do. Don’t accidentally try to transfer something gray on purpose and end up losing a critical rare trait by accident.
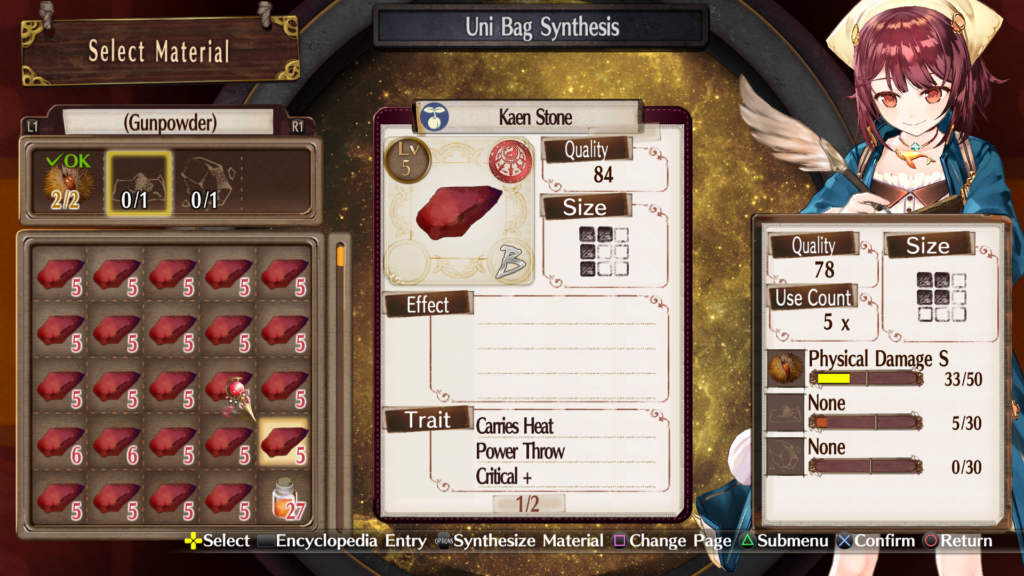
Next I choose one with Critical+.
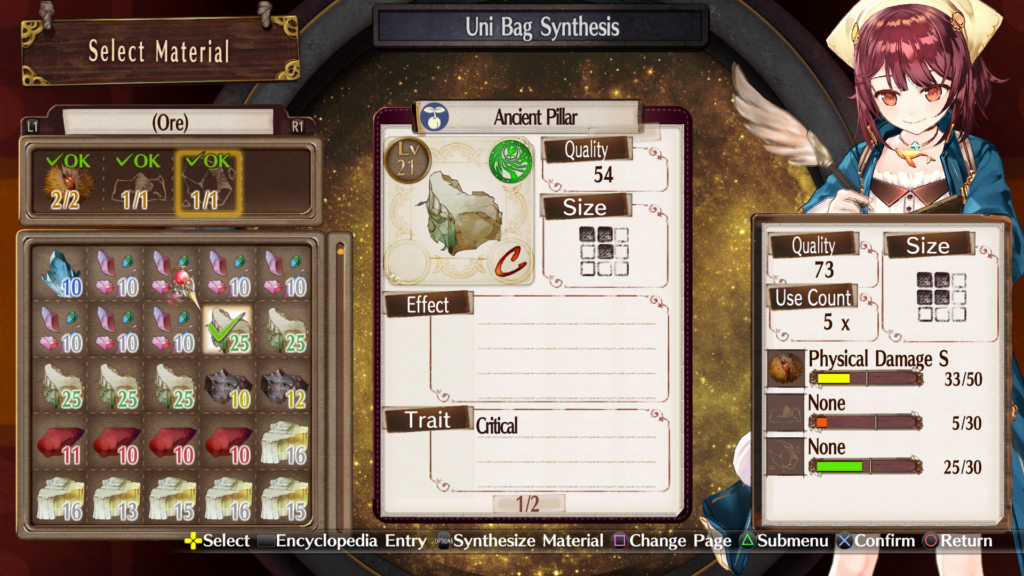
And one with regular Critical.
Once we’re in the placement screen, you can hit the triangle menu button to toggle info on the material you’re about to place, in case you want to see info on it. However, it’s not particularly useful at the moment, and I’ll show you why.
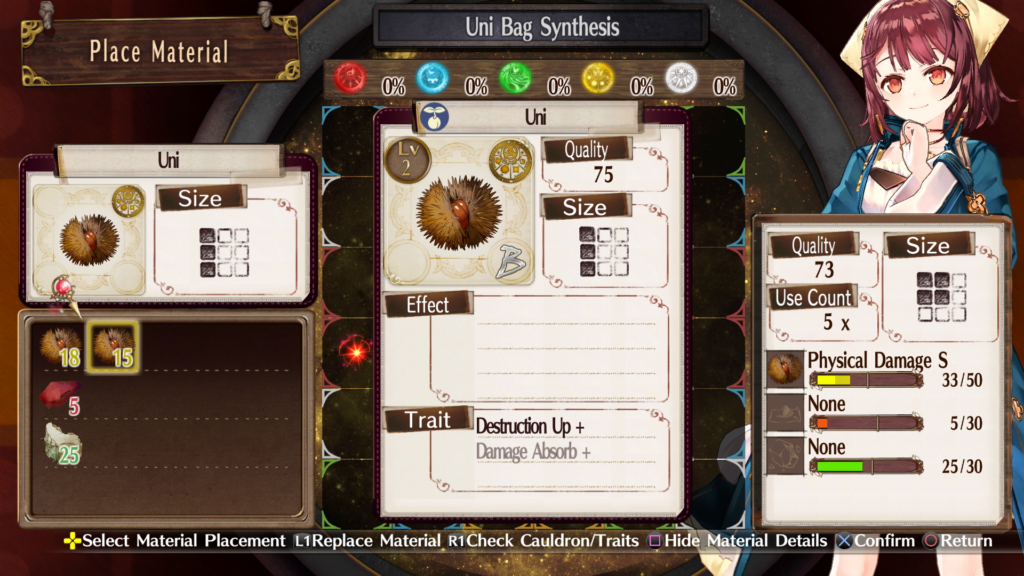
First I placed the Destruction Up+ one, and now I’m clobbering it with the next piece, putting the next piece on top of it. You’re allowed to do this, and it ends up not giving as many points towards Effects, but we don’t care about Effects right now. You don’t do this on purpose, usually, I’m just doing it to show you that you can, and what effect it will have. Remember, Destruction Up+ was the one we clobbered (which I showed with the menu thing above).
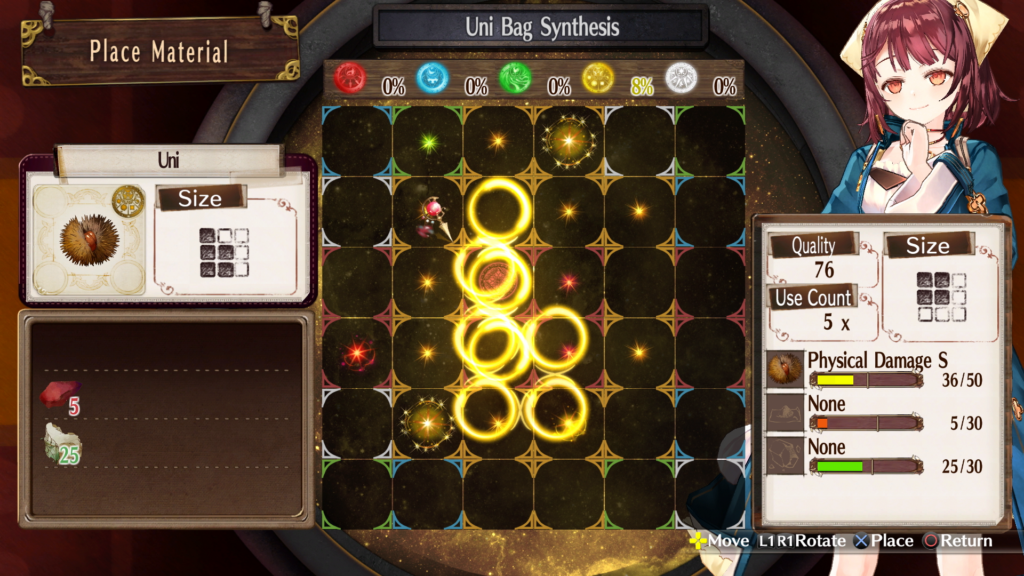
The rest of them I just made fit nicely, and click done.
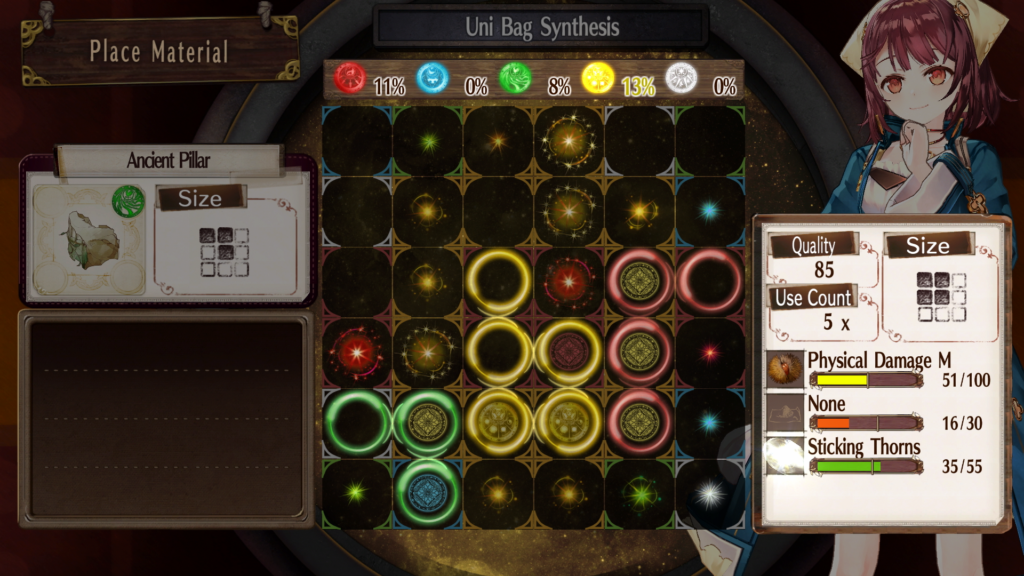
So, there’s a bunch to mention here, shown below. For one, absolutely nothing special or bad happened to Destruction Up+. Yup, that’s right, even if you put something on top of it, you can still get the trait from it. Some FAQs claim this isn’t the case, and maybe it was the case in an old patch or something, but don’t worry about it in a modern version of the game. If it’s in the ingredients and it has a Trait, it will be available, period. Select that, and it will appear on the bottom middle on the item.
Secondly. What? Where did my Critical and Critical+ go? Here’s another feature – some Traits combine. Critical and Critical+ are one of those such pairs. To see the rest of them, see the Combine A and Combine B columns of the Traits Chart on the chart page. Note that the chart is huge, so even at 100 per page, you still have to select Next and Previous to move along, or use the search bar, which is a text search on the whole table.
Back to the Uni Bag at hand. You made a Critical Finish Trait instead, which is better than either Critical or Critical+. Awesome. Though, just to note: doing combinations like this on end-use items like bombs and weapons and armor is a bad idea. Do your combining on synthesis items, and then use those to make more items later. Imagine this was your only Critical or Critical+ Trait. Now your S.O.L. making another Uni Bag with Critical Finish, let alone even the regular ones. Be careful not to lose rare traits – store them on a bunch of materials, and then use those materials to make items you actually need.
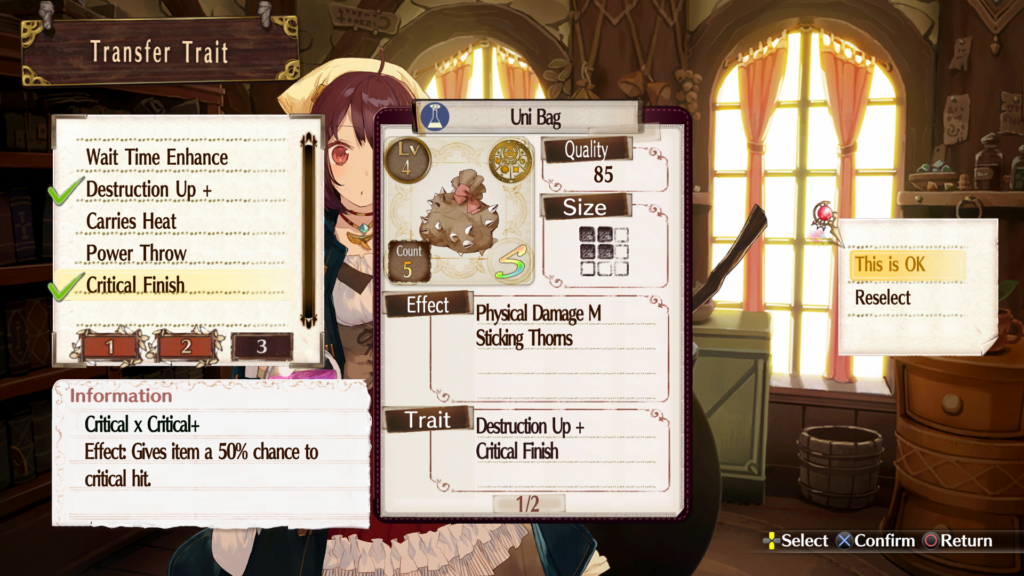
If you don’t want three of your traits transferred (you can transfer at most 3), click the Option button and you can skip selecting more – you can even make items with zero traits on purpose. Why? Well sometimes it’s confusing when you look at your items, deciding whether you had deliberately put something there so you can utilize it later, or if it’s just junk. Personally, I strip Traits from items unless I mean for them to be there. Late in the game, anything that doesn’t specifically have a Trait you want on it is going to be filled with Pro Perfection, Super Quality, and Quality++ anyways, but that’s for another day to explain.
Important: you can stack things that are similar: as long as they don’t combine (check the Traits Chart for that), you can have two things that raise the same stats on the same item, and you can have the same exact Trait on multiple items on the same person! Yes, you can put the same HP buff on both accessories and your armor, on the same person. Yes, you can have two different HP buffs on the same accessory.
Filtering Materials
Now’s a good time to mention that I did not just scroll through a hundred materials to find the ones with those Traits. There’s a very helpful sorting and filtering ability in the game, please make extensive use of it, or looking for things will be truly painful. On the material selection screen, click the triangle button to bring up a menu – you have an option of Sort or Filter. I’ll show you Filter, but try sort out as well – they can also be used in combination. Select the thing you want to filter by – in this case Traits. Also note that you can filter by multiple things here and they’re cumulative.
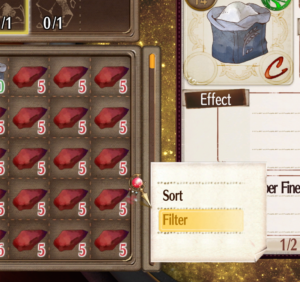 |
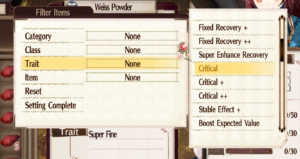 |
I selected Critical (and if Critical wasn’t there, that means that there’s nothing on this particular screen with Critical on it). Then I selected Setting Complete. Note that if you just jump out of the screen, it won’t take hold, you have to select Setting Complete.
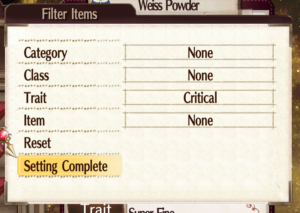 |
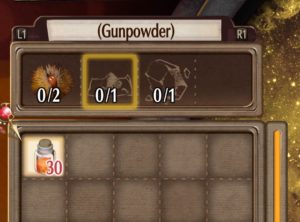 |
And with that, only the items with Critical on them are available. You have to reapply the filter on each material page. If you want to remove the filter, you can either go to the filter, select Reset, and then also don’t forget Setting Complete – or, you can go to an adjacent material page and back, and that will reset it as well.
Note that this works on your main material page on the menu (while you’re in your Atelier), so that you can search ALL your items for a trait, and then decide what you want to do with them later. Main Menu (triangle) -> Container -> Panel Button -> Menu (triangle) button again.
Effects
Let’s get down to the nitty-gritty, here. This is the part that’s explained least well in the game, and not even particularly well in the various FAQs out there. It isn’t too complicated once you get the hang of it, but there are a lot of moving parts, and it’s not clear what connects to what, or what your strategy should be. Once you get the idea, it’s way more challenging to make it work to get top-grade equipment than it is to understand, and the game becomes way more involved and deep for it. This is where this game really shines, in terms of complexity and challenge. It’s fair, it just takes juggling a bunch of things in your head. You’ll see.
First a few reminders:
- Effects are not like Traits, in that you cannot transfer them
- Also, you can’t see what Effects are possible until you’ve achieved them once – you can see a full list of them on the Effects Chart, but in-game they’re filled with ????’s until you manage it once
- You get only the Effect you end up with, not the ones “along the way” up to it on that row of the Effects bar – we’ll get to what that means in a second, but sometimes you actually do want to not push a particular Effect all the way to the end, because the mid-level one is potentially more useful
Now for some more details that we’re going to refer to during the explanation:
- The “Value”, or more specifically “Category Value” of a material or item is “how strong” it is during the crafting process. Generally, harder to find or harder to make items have higher potency. You can tell the category value by looking at the number on the icon of the item itself, the big white 10 or 35 or whatever.
- The “Size” is how many squares are in it’s little tetris shape, under “Size” when you look at an item or material detail. While the shape matters in terms of how it’s going to fit into the little tetris-fitting puzzle game that is the synthesis screen, the number of tetris squares is the critical thing to keep in mind. A long L shape is 4, a full edge line is 3, a full 3×3 block is 9, etc.
- The “Effect line/bar” is the thing on the right, for which there’s 1-4 of them on a given item that you’re crafting. It has a colored bar that grows, and numbers that look like “10/50” on it.
- “Bonus” is the set of 5 “percentage” numbers at the top of the synthesis screen where you’re actually placing the tetris blocks. There’s a colored disk and then a 0% next to it that grows as you do stuff.
- “Stars” (sometimes referred to as Bonus Stars in the game) are the glowing or rotating blotches on the placement screen that grow as you do stuff.
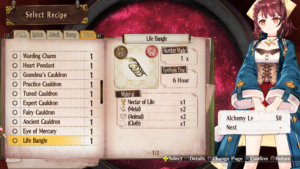
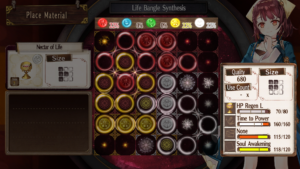
Those are the terms we need to know, and the factors that need to be balanced out and maximized in order to get the Effects that you want from a given crafting. Let’s craft an end-level item, the Life Bangle. This one is exceptionally difficult to max, so I’m going to show you a couple failures along the way, so you can see what kinds of things go wrong and how to fix them.
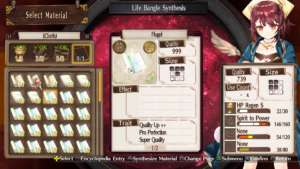
The first ingredient is itself a magic item. Some of the end-game items require a chain of other items that feed into each other as ingredients. I happen to have a bunch of these, so it’s not a big deal. But pay attention to a couple details in the below pictures. First of all is the number 22 on all the chalice-shaped icons. This is the “Category Value” thing I mentioned above.
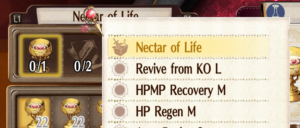
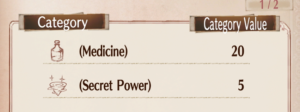
It’s not listed anywhere else on the detail screen here, only on the icon. If you hit the Panel Button, select Nectar of life, and then the Square Button to cycle through the pages on Nectar of Life, you’ll also see it there. What this means is that if you use it as a (Medicine) in a recipe, it’ll be “20 potency”, and if you use it as a (Secret Power), it’ll be “5 potency”. Since we’re using it as specifically a Nectar of Life (the recipe was specific, it didn’t ask for a category), then the Value (I’m going to write Value from now on, but I mean Category Value going forwards – actual monetary value is basically pointless) is something weird that’s close to adding them together, hence the 22.
 |
 |
Also notice that it’s a T-shaped thing and therefore has a size of 4. The size on the right is the end-result size of the item you’re making, and isn’t something interesting right now. And the color of the item is also important – it’s the white disk to the upper-right of the big cup icon, to the left of 999.
However, specifically pay attention to the glowing white bar on the right, under “HP Regen S” and next to “22/30”. This first thing you are selecting on the left is doing something with the first row of stuff on the right. This is critical.

Next item. Now, since we’re actually paying attention to the qualities of what we’re using, we end up needing sorting and filtering. The most common sort you’ll end up using when trying to achieve particular (or perfect) Effects is “Category Value”. (Not “Value” – that means gold-value, and it’s basically a completely useless search.)
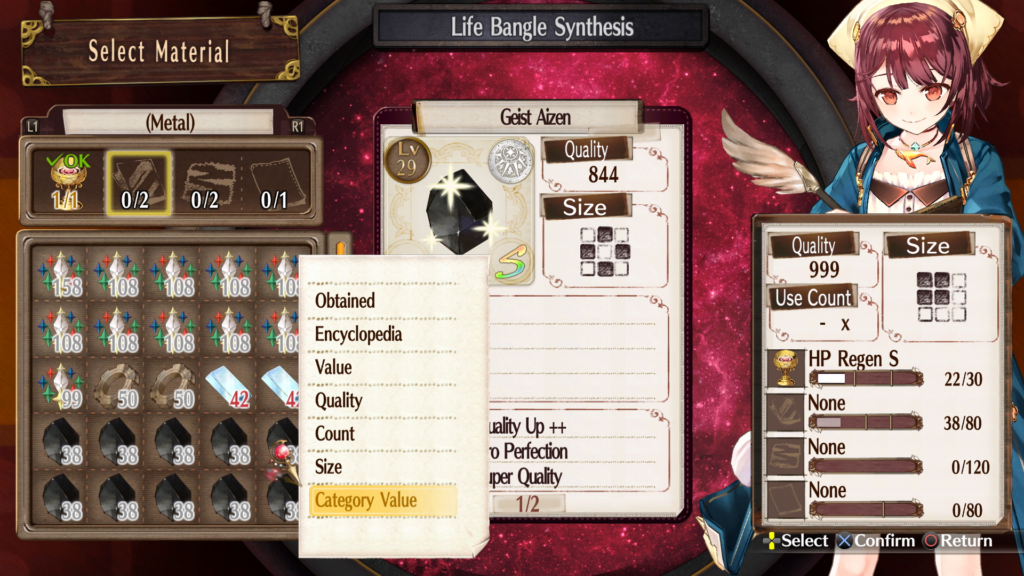
You’ll notice that all the numbers have lined up, with 158, 108, and 99 at the front. (Though if you’re just starting out, note that you’re not going to have any 99+ items for a very, very long time. This is the purpose of making Philosopher’s Stones, by the way, it’s because they have this insanely high Value.) Anyways, I’m scrolling through a few here, notice what happens as I hover over the thing on the left (the second ingredient)… pay attention to what happens to the white bar on the right (the second bar). The higher the Value of the thing I hover over (or select), the more it makes the bar fill. Ultimately, I picked the second thing, which is a white thing with size 4 also, though a weird hook-shape, instead of a T.
Next item. Still for the second ingredient though. The recipe called for two (Metal)’s, however it’s still one of the second ingredients. This one’s red, size 4. And it made a red bar increase on the second line on the right. See a pattern here? The red bar isn’t as big, but that’s because the 38 next to the blue bar of Harmonium is a bit smaller than the 108 of the Philosopher’s Stone.
Next ingredient. We need two (Animal)’s. Yes, Crimson Stone’s count. Another reason to make them in the late-game – there are very few things that are synthesizable that “count as (Animal)”. Also a Strong Bone. For the third ingredient. One red and size-4, one yellow and size-4. Notice a red and yellow bar have increased on the right on the third bar. Patterns, patterns.
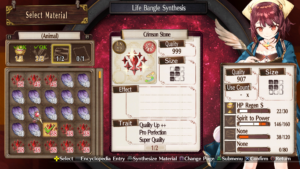 |
 |
Finally the last ingredient, a (Cloth) item. I chose a yellow one of size 4. Guess what color the bar is on the corresponding bar on the right. Yep, you’re getting the pattern now.
OK, so to sum up so far: each (horizontal) index/number ingredient is tied to the same (vertical) index/number bar on the right, and the colors match up with the colors of the ingredients. The bars are which Effects you’ll end up with, and the size of the bar corresponds roughly with the Value (potency) of the ingredients. However, the Value alone was not enough to fill up the bars. Too bad.
Also, note that we chose 2 white, 2 red, 2 yellow, and every single one was size-4. This matters, but just keep it in mind for now.
Now let’s take a look at the placement screen. For now we’re working with Grandma’s Cauldron, but these rules also apply to the Practice Cauldron and the Tuned Cauldron. Yeah, they all work slightly differently. I’ll show you a little bit of the difference in a bit, but just for reference, these three are similar. If you happen to notice, I not only have a 6×6 but also I can rotate the pieces – you eventually get these abilities, just not right at the start of the game.
On the screen below, the ingredients are on the left, and the Effect bars on the right, just like before. However, now we have this big, colored grid, some of them with glowing stars in them, and a bunch of numbers on top next to colored disks.
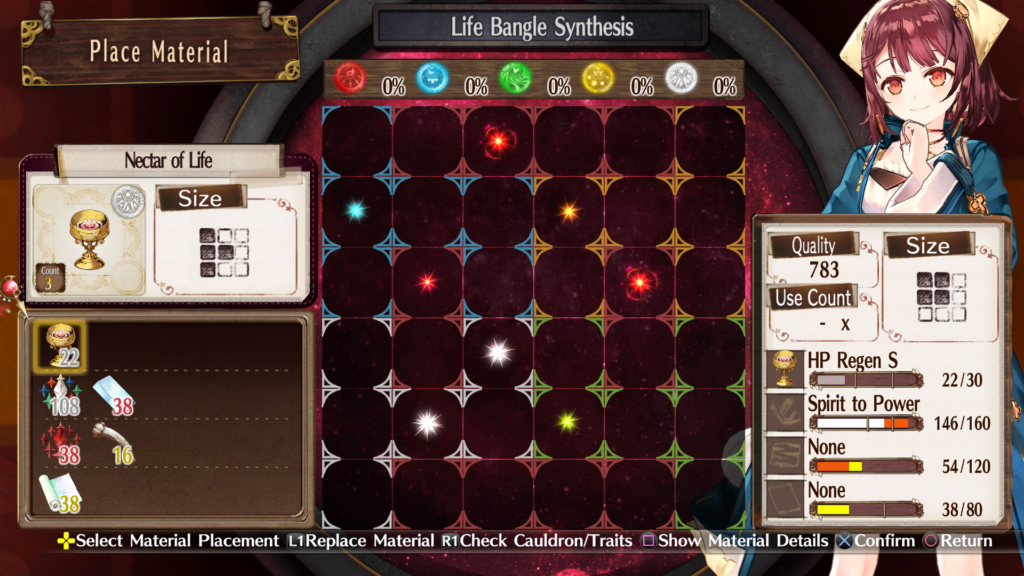
Here’s what happens when you place a piece on the board:
- Whatever Value it has actually solidifies on the right. The amount of the bar that was there before was the minimum, the default amount that you get for placing a piece. If you place it on squares with no stars, you get exactly and precisely the Value of the piece in the bar to the right, meaning the bar won’t move from what you saw before you placed it.
- If you happen to put it on a star, you get a bit of “bonus” value. That’s why these are often referred to as “bonus stars”. If you see below, the first bar filled a tiny, tiny amount more than it’s default in the picture above, reaching to halfway through the first “e” in “Regen”, instead of being just barely to the end of “R” before. Yeah, it’s really tiny. But if you look above, I only placed it on top of a single tiny star, that’s why.
- All the grid spots next to the piece I just placed grew stars, including diagonals. Compare vs above, you’ll see it. Also, the white star near the center got bigger. This is what happens – stars go up one level, including from zero to one, when you place things.
- Finally, the numbers on top changed. I placed a white piece, so the white number jumped. Notice a pattern here?
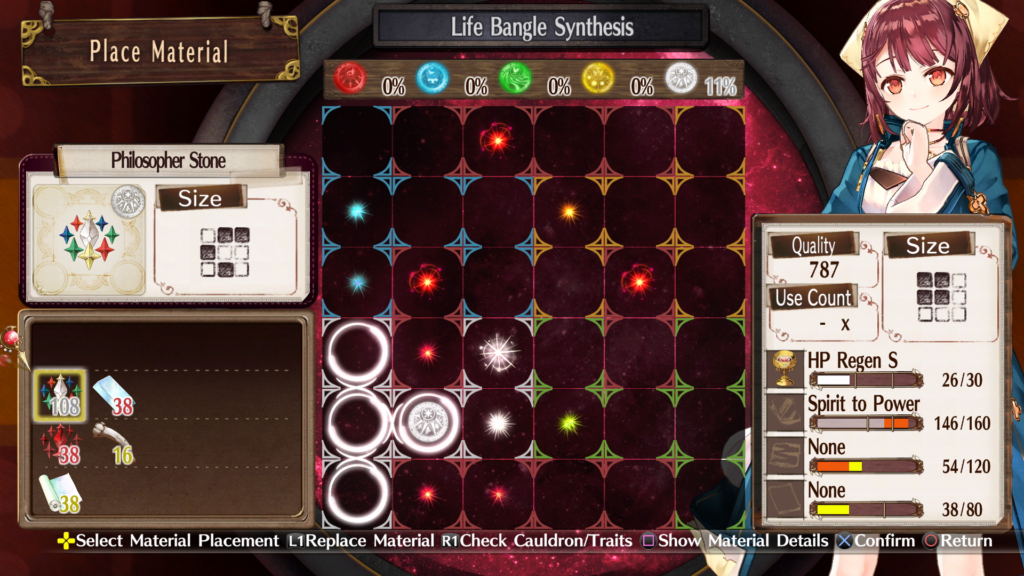
How much did it go up, though? What does 11% have to do with anything? It is tied to the size of the piece you place. The page is 6×6 or 36. You placed 4 spots. That’s 4/36 = 11% of the board. If you place another size-4, it would go up another 11%. If you place a size-8, it will go up twice that for 22%.
So you probably see where this is going. The next piece you place, if it happens to be next to this one, is going to get more of a bonus, because you can put it on more stars. Yep, that’s the idea. The first one always sucks because there’s not many stars to start with, but they grow as you add things.
Note also that putting a yellow piece on a yellow star is better than on a white star. It’s still better than nothing to place it on a wrong-color star, especially if it’s a max-size star, but you should prefer same-colored stars over other-colored unless it’s a choice of max-vs-nothing. Note also that the color of the star is tied to the color of the box in the grid, and it doesn’t change.
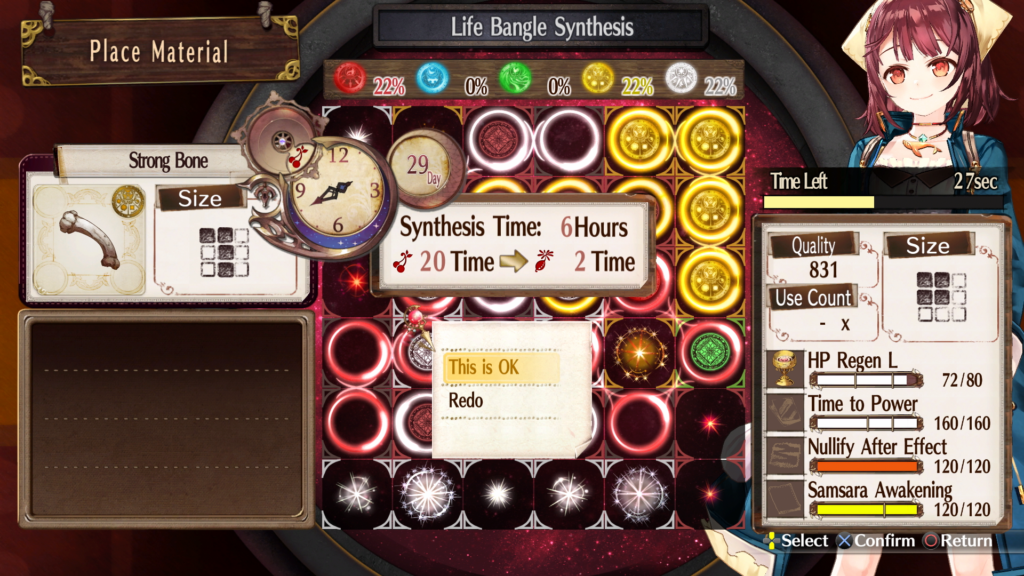
I’m not going to go through an exact play-by-play for this, but here’s what it looks like when you place the final piece:
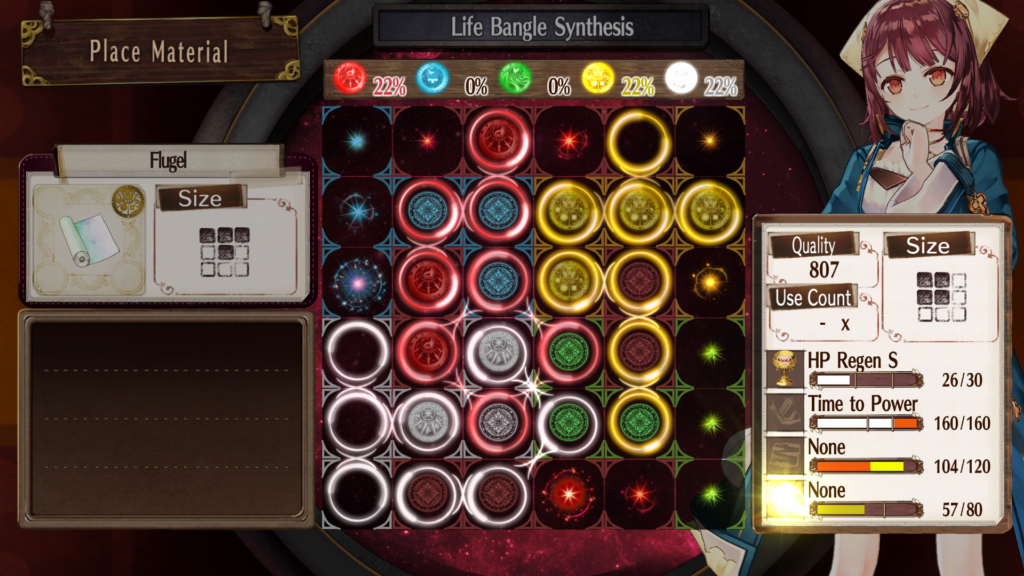
The second bar is maxed, the others are not. However, when you do this in the game, there’s a whole bunch of movement all of a sudden. The above screen lasts for less than a second, and suddenly all the numbers jump! Wow, now the third bar is suddenly maxed as well!

What happened? How much did it go up and why? See the percentages on the top? That’s how much they went up by. Red went up by 22%, yellow by 22%, and white by 22%. Those bonuses just don’t apply until you’ve placed the last piece.
That’s great. That means that if you use bigger pieces, you’ll get more percentage, right? Yes. That’s exactly what it means. However, there’s some big caveats with this:
- Larger pieces are harder to place, they just don’t fit well. Sometimes you need to use them, but it’s not always as simple as shoving in a bigger piece.
- That being said, if you do manage to fill all the squares on the board, you get a bonus.
- However. And this is a big however. Only the largest percentage counts.
What does that mean? If you had 25% red, and 22% yellow and white, then red would get a 25% boost and yellow and white would get absolutely nothing. Zip. Zilch. Zero.
Now you see why I selected 2 size-4’s each of three colors. Because if all the percentages are exactly the same, then all of them are the highest and all get the bonus. You basically want to always aim for this, unless you have some really smashing pieces that have insane Value, or if there’s not as many Effects to split up need for pieces, or you a lot more ingredients that you can dump in for a ton of combined value.
The other way to get around this is to use all the same color. This is a very important strategy as well. However, it often just doesn’t work, because you don’t always have every color of every category of material. Oh well.
Another couple remaining points on Effects:
- You don’t know what their names are until you get the bar up to that point, and you won’t get a slot in your Encyclopedia explaining what they heck it is until you actually finish an item with it on it. Merely getting the bar there but then going past it isn’t good enough. You have to stop on it on a completed item to have it listed.
- Note the second number next to the bars. It says X/Y. That means Y is the max amount, right? No. It’s the max amount for that level of Effect. If you go back to the previous two pictures, you’ll see it jump from 26/30 to 32/60. The max size of the bar physically doesn’t change, but the /Y number does not represent the max amount for the bar until you’re into the “final section”.
And a couple strategies to mention:
- Put things down that you don’t need the bonus on as much first. If the first ingredient is almost filled out from the beginning, use something from that ingredient as the first one that won’t have many star bonuses, so that you can start yourself off making bonus stars for the other ingredients that need it more.
- Sometimes it makes sense to sacrifice a piece in order to get good stars for another piece. What I mean is that you could put down a one-block piece, so it would make 8 stars around it. Then clobber that with another one-block piece on top of it, making 8 better stars. Then another one-block on the same spot, making 8 maxed-out stars. You could either then surround that area with other pieces or theoretically clobber it yet again with a full 3×3 piece, which would get the benefit of an insane 8 maxed-out stars. Of course, you don’t need to do this three times, but you get the idea of placing a piece just to make stars, even though you’ll clobber it later.
One important note: if you clobber a piece, it does count towards the Effect on the right, but it no longer counts towards the bonus percentage on the top. Sometimes this doesn’t matter, but sometimes it does. In fact, sometimes it’s even helpful to deliberately clobber something, just to even out the percentages on top. Definitely an advanced technique.
Next, let’s see if putting things down in a different order and different orientation matters:
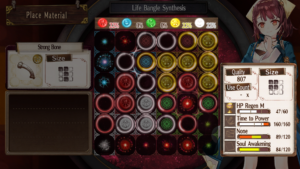 |
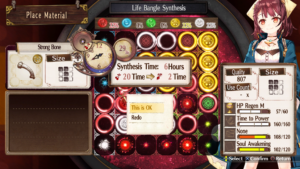 |
Wow, yeah, that’s a lot closer. The third bar wasn’t filled out perfectly any more, but the others were really close. How about a different Cauldron, like the Tuned one?
Cauldrons
The exact stats for each cauldron can be found on the Charts Page. But let’s go through using a couple while we’re still using the example from above. Tuned Cauldron time:
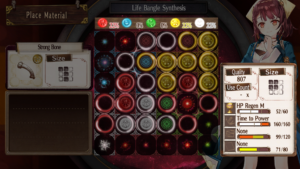 |
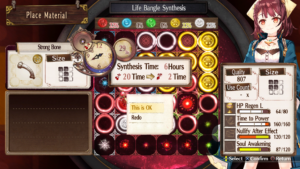 |
Damn. So close. The Tuned Cauldron starts with more stars and the bonuses count for more. But it wasn’t quite enough. I know, let’s use the ultimate one, the super-awesome Ancient Cauldron that you get for beating the game. Muahahahaha, power, right?
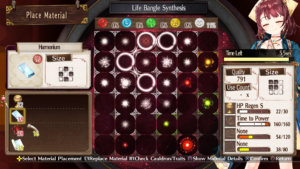 |
 |
Wow this is looking great, it’s already better than the other one, and the bonus still hasn’t kicked in…
ARGH. SO CLOSE. So, so, so close. Just a sliver off for the first Effect.
Wait.
What’s the funny bar under Sophie’s chin. It’s counting down.
7 sec?
Cancel. Cancel. It’s not letting me cancel. WHY IS THERE A TIMED BAR?!?! WHY CAN I NOT CANCEL OUT AND PICK ANOTHER CAULDRON?!?!
Oh, Sophie.
Ya know ya done screwed up.
Crap.
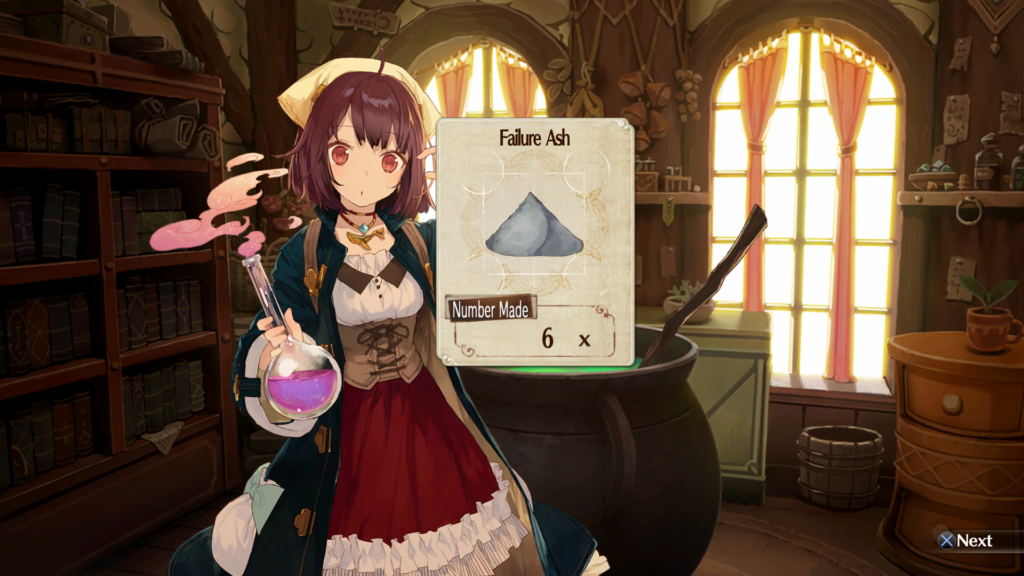
Yep. All those expensive ingredients have been flushed down the toilet, and I have a nice LITERAL PILE OF FAILURE to show for it. Let this be a warning to you, kiddies. The Expert Cauldron and Ancient Cauldron are very powerful, they have a much larger bonus than the others. But they have exactly a one-minute real-time limit, and you cannot cancel out. Once you pick up a piece to place it, you’re stuck. Always save before you use either, so you can go back. I did. (By the way, don’t throw out Failure Ash if you accidentally make some, as long as you don’t need the ingredients you burned, as it’s actually used in one high-level material much later on.)
OK, let’s move on to the Fairy Cauldron. This one works a little differently. The bonuses are a little smaller than the Tuned one, but it has a really neat feature. The stars that are generated don’t follow the grid, they follow the color of the thing that you just placed. That means you have control over where the stars of a particular color are, which vastly improves bonuses. If you put another piece next to one of those spots, the star will change color to the color of that piece, but the star will still grow. Here’s how it turned out this time:
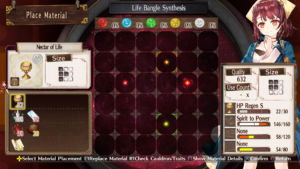 |
 |
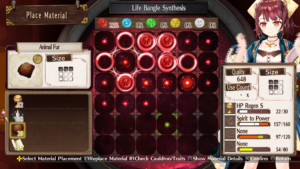 |
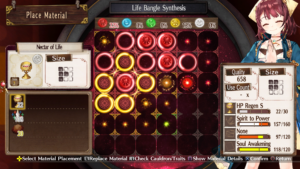 |
 |
 |
 |
 |
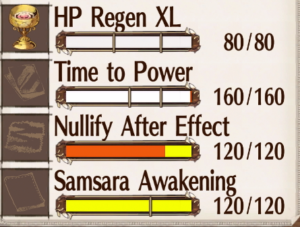
YES! PERFECT ITEM! FINALLY!
Though I’d like to take this opportunity to remind that this is one example of not necessarily wanting to max everything. The “Time to Power” Effect means that whoever wears this has their Speed reduced in order to improve their physical attack damage. That’s great for your tanks, but it’s not so good for your spellcasters. Another example is that some of the protection items protect against something really cool mid-way, like No Heal or Curse, and then if you max it out, it protects against Blind instead, which is much less useful to protect against. So be aware, and choose wisely.
Also note, I never once in the game needed the Expert or Ancient Cauldron for anything. I bounced back and forth between Tuned and Fairy, and that was fine for nearly everything. Occasionally the Practice Cauldron, because it has less stars to start but the bonus per star was a little better, and sometimes that balance made a sliver of difference. Sometimes, when you’re just tossing things in and don’t even care about placement, Expert or Ancient are fine, because they increase the Quality value more than the others, but it’s usually not super-helpful.
How do you get the other Cauldrons? The plot provides you with the first one right away. The Practice one you can buy from a merchant at some point not too far into the game. The rest are all found lying around in dungeons, but I won’t drop spoilers here. The last one is post-game only.
However, there’s one remaining very important point to cauldrons. You can upgrade them! Once you get a new cauldron, you automatically get a recipe for upgrading it. If you use the Grandma Cauldron recipe, you’re producing a replacement for the Grandma’s Cauldron, not an extra. So don’t accidentally downgrade them by making one with worse Effects than you currently have. They can’t get worse than the state they start in, though.
But this is how you get flip and rotate. They’re Effects that you get during the synthesis process of that crafting. Also, upgrading to 5×5 and 6×6 is another Effect. Keep in mind that you can use one Cauldron to enhance another, and then turn around and use that improved cauldron to enhance the first, back and forth. You should be able to make Grandma’s one better when you first start out, but you won’t be able to max it until you can do this juggling between two cauldrons. The Bonus Level is also another Effect during that crafting, and is worth it – all the Effects are worth it. Definitely try to get a perfect synthesis of all your cauldrons.
One last thing: the special ability on Grandma’s is “No Failure”. I mentioned level and failure earlier but didn’t explain myself. All recipes have a minimum level. 90% of the recipes that you get can be made immediately, because they’re timed with where the plot expects your level to be. But some are higher level, and you need to do more alchemy before you can do them. Except with Grandma’s. If it has the No Failure Effect, then you can make anything, and it won’t turn to Failure Ash.
Advanced Synthesis Topics
Cycles
One problem you’ll start running into as soon as you start collecting Traits and wanting to put them on things is how to get them from X material onto Y item, when Y doesn’t require X as an ingredient. Well, that’s where the concept of pipelines (or loops, or cycles, or rotations) comes in. Basically there’s some “routes” you can take, to turn X into A into B into C and thus can be used for Y. You can definitely figure them out for yourself, especially with the help of the Materials table on the Charts page, but if you want some ideas, here’s some of the most common ones:
- Zettel -> Ramel Flour -> Neutralizer R -> Zettel
- Apcol -> Mineral Extract -> Pure Water -> Apcol
- Alchemic Clay -> Neutralizer Y -> Alchemic Clay
- Neutralizer B -> Refresh Oil/Pure Water -> Neutralizer B
- Mineral Extract -> Neutralizer Y or Apcol -> Mineral Extract
- Gold Thread -> Cloth -> Crystal Ball -> Alchemic Clay -> Neutralizer Y -> Zettel -> Ingot -> Golden Thread
Let’s say you find a nice Trait on a piece of clay lying around in your travels, like some Seabed Soil or Fairy Ball mud, but you really need to transfer it to an Ingot so that you can turn it into a piece of armor. Well, the last cycle there has Ingot in it, so make either Alchemic Clay or Neutralizer Y out of the mud and transfer that Trait, then make some Zettel, then an Ingot. Bingo. If you found the trait on some (Thread) item out there, then make some Gold Thread or Cloth out of it, turn that into a Crystal Ball, into Alchemic Clay, etc. These loops are useful because you can loop around and around if you need.
This is particularly important when you have 3 Traits that you want on that Ingot, so that you can make some armor or accessory out of it with all 3 on it. For that, you might want to load all three individually into Alchemic Clays, using whatever path you like, probably a different one for each. Then, you can make another Alchemic Clay using those three, and transfer all three traits there. Then move on to the Ingot.
- Pure Water -> Pure Water
- Alchemic Clay -> Alchemic Clay
This means that, for convenience sake, items that let you bring in 3 or 4 of something are pretty useful, as are ones that let you do really quick cycles to plug one thing in after another. Items with multiple inputs of the same type:
- Alchemic Clay uses (Clay) x 4
- Ingot used (Ore) x 3
Using Non-Synthesis Items
Another very important note: there are a lot of usable items, like exploration items, bombs, etc, that are very tempting to use as intermediate ingredients. Sometimes this pans out, but there’s a danger. Items that are not specifically synthesis items cannot hold every trait. For example, some recipes require an (Elixir). Well you find Mystery Elixir in your recipe list and decide to put traits on that… and then when you click done and actually craft it, using up all your precious ingredients, suddenly the traits are gone. Why? Mystery Elixir is a Recovery Item. Yes, it can be used as an (Elixir) ingredient, but because it’s a Recovery Item, it can only hold Traits related to that Category – so attack Traits, Traits meant for armor, etc, won’t stick. Be careful. That being said, some items that seem like one-time plot-related ones, like Hexe Auris, are actually synthesis types and useful – it’s one of the only white (Metal)’s out there [and also a (Magic Item) that doesn’t suffer from the issues above], it has high Value, and it’s 5/7 made from other synthesized materials, so it’s easy to make high quality or add Traits into it.
Changing Effects and Categories
Another important thing to note is that several items can change color or category based on Effects. If you make a Neutralizer R and focus on getting the “Add Fuel” Effect, then that particular Neutralizer can be used “as a (Fuel) item” in the future, which really improves it’s versatility. And some like Sun Drops, Snowflake Crystals, and Crimson Stones have “Change Color to X” Effects, which might make it available for a particularly hard recipe. Imagine in my Life Bangle above if I could have swapped out one of those low-Value items with something the same color but much more powerful. It might have made that whole process much less painful. All the Effects are listed in the Chart page.
Note that some items are crazy diverse and powerful, like Sun Drops, Dusk Drops, and Philosopher Stones. They each count as four categories, and they have really high Value in every one. You don’t get these until late in the game, but they’re super-useful.
999 Quality
At some point in the game, you’re going to need to start working on high quality items. The maximum is 999, though most things don’t need to get all the way to 999 to get most of their benefit, and a few are so painful and long to get exactly to 999 that it’s not worth it. Balance your time, it’s never going to make a huge difference between 950 and 999.
The first thing you need to do is get the Super Quality, Pro Perfection, and Quality++ Traits. You first need to find Quality, Quality+ and Quality++ for yourself. Then combine Quality and Quality+ to make the Well Made Trait, and add Quality+ to Quality++ to make Pro Perfection. Then combine Well Made and Pro Perfection to make Super Quality.
Any item you need to make a 999 quality version of will probably need Super Quality, Pro Perfection, and Quality++, at least to begin with. Why not Well Made as the third trait? Well, that would just recombine with Pro Perfection.
Basically you need to cycle some materials on themselves or in tight loops, adding Quality every time. For example make 2 Alchemy Clays (every time you get 2) with the S/P/Q++ Traits. Then use those to make more Alchemy Clay, and the quality will go up more. After just a few cycles, you’ll have 999. From there, you can make 999 Neutralizer Y easily by dissolving the clay. Refresh Oil, Apcol, and Mineral Oil are next in line. Then Golden Threads, Ingots, Zettels, and Cloth. Once you start this process, keep a bunch of extra 999 of each type, that has S/P/Q++ on them, at all times. You’ll need them in other recipes to get high quality results.
Note that you can use replication in this process to make things easier. Make a decent clay, replicate 10 of it, and then you can make more clay from those. You’ll skip several cycles that way. Replication is mentioned below.
I’d go through the specific process for more of them, but there’s already a blog entry that’s about as concise as I could be, so there’s no point in copying it, as I have nothing extra to add to it. Check it out here for the precise steps to get the top 10 items to Quality 999. Do note that if some of them are slowing down and getting really tedious, don’t kill yourself over it. Unless you’re trying to kill all the super-bosses on Despair difficulty, you don’t need that level of craziness and time consumption. And even then, the difference between 950 and 999 is miniscule.
Replication & Refilling
For the early game, when you use all of the bombs or medicines in a particular “pack” of them, it disappears. However, once you get to a certain place in the plotline, a new feature opens up. Instead of disappearing when you use the last bomb, you still keep the bomb item in your inventory, but it goes to “0 uses”. When you return to town, you have the option of paying money to refill them. At some point, you can even auto-fill everything the instant you return to town. I recommend you turn this on, it’s not that expensive, and it’s way less time-consuming than remaking those nice bombs with awesome Traits and annoying to craft Effects, right?
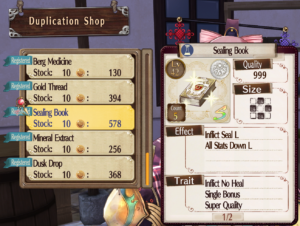
Around the same time, you get the ability to drop off an item with a vendor and have it copied 10 times, and then purchased at will. Also definitely take advantage of this. Yes, it takes a week to refill the vendor. But time doesn’t matter, remember? Go sleep for a week and come back, who cares. Once you make optimal (even just at whatever point you’re at int he game now, not ultimate-optimal) bombs and healing items, drop them off and replicate them. Always have one left over to replicate later.
Also use replication to make more of the hard-to-construct synthesis items. Quality-999 items, stuff like Philosopher’s Stones and Crimson Stones, Golden Threads and Cloths of various sorts and Ingots of various sorts with your top-level Traits on them, so you don’t need to make more of them separately, etc.
Note: you cannot duplicate weapons and armor. Not at all. This is annoying but there’s no way around it.
Also note: if you put the No Price Trait on an item and duplicate it, you can buy it for free. However, that takes a Trait slot that you might have wanted for something else. Late in the game, gold isn’t too hard to come by, so this isn’t a major issue.
Requests & Rumors
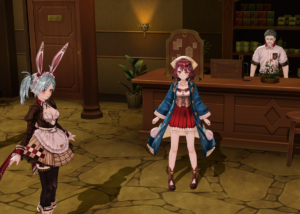
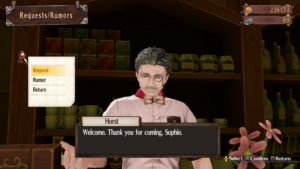
Horst the bartender and Tess the hostess work in the Cafe, one of them is always there. You’ll be going into the Cafe many, many times to talk to one of them. There’s a bunch of event trees that come from both of them, so check in periodically. But the big thing in the building is the Rumor mill you get from Horst. He’s a constant source of events and information. As far as Tess goes, she has a long event chain, but she also sells a few key items, using “points” that you get for completing requests, called “Tickets”, on the upper-right in the middle picture below, or just below the gold in the upper right on the right picture:
 |
 |
 |
Rumors
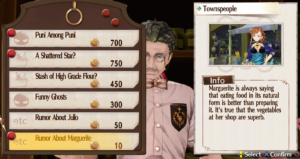
Rumors first. These are either “there’s a strong enemy you can fight, or a weird occurrence of some sort”, or “there is a hard to find material that can be collected” or “gossip about some PC or NPC”. You get almost no information until you pay the money. None of these give you any money for “completing”, but they do provide useful opportunities. Most of the gossip is useless, it’s character background, or what kinds of gifts to give them (as part of a Friendship event), or what-not. Lists of actionable Rumors can be found here.
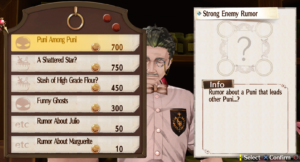 |
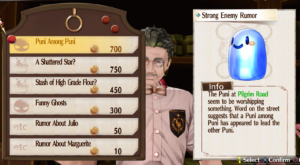 |
 |
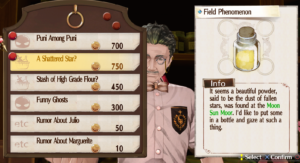 |
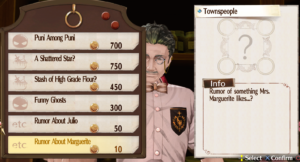 |
 |
Requests
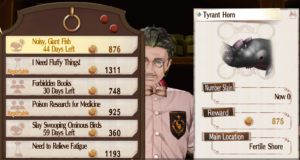
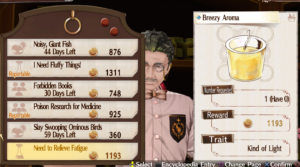
Requests, on the other hand, are fetch or hunt or craft quests that repeat themselves, some are one-time, some affect other event trees. But they give you money, so it’s a good source, especially early on, for some funding. Note that many of the Requests have multiple pages – you have to click Square to flip between them – and you have to fulfill all of the pages in order to get the reward. Here’s an example of one “hunt”, one single-crafting of a custom item, and one that requires a bunch of items to fulfill.
 |
 |
 |
On the hunt quests, you get paid “per enemy”, even if the hunt says “kill at least 5” or something. There’s a limit, but basically if you kill 20 of the requested monster, you get 20x as much as killing 1. On the crafting ones, you do NOT get money for making extras, so don’t waste your time. There’s no full list of Requests, they’re pretty randomly-generated. Take note, though – the crafting ones are usually an item plus a trait. Just handing in a Breezy Aroma for the one listed above is not good enough – you must hand in one that has the Kind of Light Trait on it. It can have other Traits, but it must at least contain the ones listed. Usually they pick a really annoying one to get on the required item, something that you really need to push through multiple syntheses in order to achieve. Which is pleasantly challenging.
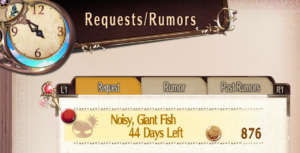
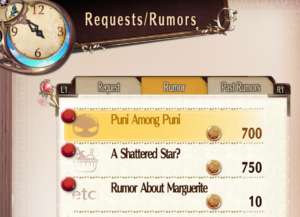
Let’s follow two of these Rumors and the Request to their conclusions. The Gossip one about Marguerite isn’t actionable – it’ll remain on your Rumor list for a while and then disappear in a few days or a week. You can see them on your main menu, select Rumors/Requests:
 |
 |
Request and Rumor Example Walkthrough
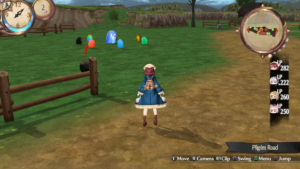
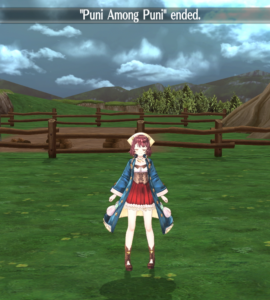
First the “Puni among puni” Rumor. This is one that you’re actually likely to do pretty early, and it’s the first place you’ll find Gold Punis for money-harvesting. However, be careful of the boss, he’ll kick your ass early on. First thing to notice is that, on the World Map screen, there’s a huge glowing-blue star on the location of a Rumor. This is to help you find the locations. Once we go inside, sure enough, we find a bunch of high-level puni running around (which is not normally the case on this area). And when we kill the boss, we get a message up top that the Rumor has been cleared. That means no more Gold Puni here, so if you want to farm, just kill what you want, leave, come back, and repeat. Eventually the Rumor disappears on it’s own, but it takes at least few days or weeks.
 |
 |
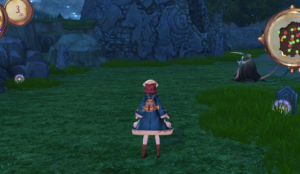
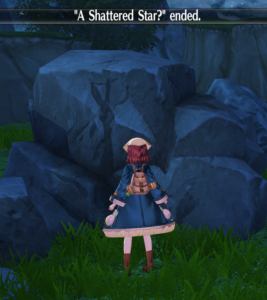
Next let’s try a “fetch the rare material” type Rumor, “A Shattered Star?” This is the one and only way you get Star Powder (a lot of these Rumors are the only way you get some materials). So first we notice that Moon Sun Moor is once again glowing blue, since there’s a Rumor there – and at night, the glow is more distinct and detailed. As we’re hunting for the material, it might not be on the first sub-area – in the case of this one, you need to take the second exit into the cemetery in the back. Once there, you’ll see in the second picture that some of the glowing materials are really glowing, like sparkling and much brighter. That’s the “special material” for the particular Rumor. Once you pick both of these two up, the Rumor ends, and the next time you go to the area, these materials won’t be there.
Important Note: as soon as you collect a number of sparkly dots equal to the number they expect you to get, the Rumor ends. In this case, there’s two on this sub-area, so they expect you to collect two… however… if you collect one, then leave the sub-area, come back, there’s two there again… grab the first and the Rumor will end… but the other one won’t disappear, grab it for some extra. Basically, always grab all but one, leave, come back, and grab them all again. You’ll get more per Rumor.
 |
|
 |
 |
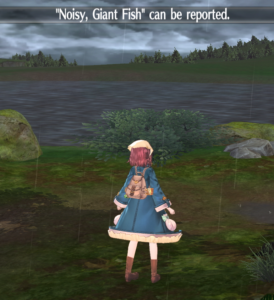
Now let’s go do the hunting request, “Noisy, Giant Fish”. Run along to the area indicated in the Request, in this case Fertile Shore, and look for the beastie. Notice that there’s a little “scroll” icon on the map here, instead of a glowing blue star – this is the indicator that there’s a potential request here. The orange dot or non-orange dot is unrelated, we’ll cover it in the Exploration section. However, do note that there’s a scroll hovering over another area nearby. That’s because this particular monster is actually present in multiple areas, and killing them in any of them counts.
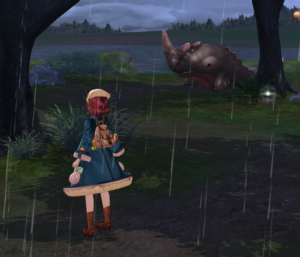
Anyways, let’s enter the one closest by, the one intended. In this case, it’s the first thing you run into, a brown palette-swap version of the whale creatures that are all over. Beat’em up and you get the same message as when Rumors are over. However, Requests last for 40+ days. So you don’t have to go and collect money yet. You can run around and kill more of them for more money, as long as you collect before the time runs out.
 |
 |
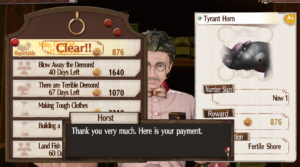
When we finally return to collect, we get the price of the Request times the number of them we killed. Killing extra is a very good way of raking in money, if you’re powerful enough to do so. Also notice the Request and Rumor Boards. The Requests have cycled – they only last so long unless you accept them, so don’t wait to accept if it’s something you want to do. However, you can only have 6 on the screen at once, so if you accept all 6 and don’t do them, no more will pop up in the mean time. Same thing with Rumors. However Rumors will cycle in faster if you get rid of them, so sometimes paying for the stupid gossipy or tutorial-ish ones just to shove them off the list is a good idea, as long as you can afford to throw away the money. A few event chains are also tied to Rumors, so doing everything once isn’t a bad idea, in any case.
 |
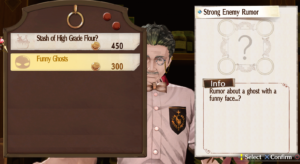 |
Note, you can cancel requests you don’t want any more. Horst will throw shade at you and guilt you for it, but he can go hunt puni himself if he feels like it. By the way, cancelling on him a few times is part of a recipe hint, so suck it, Horst. That being said, definitely do a bunch of Requests – there are milestones for how many you do, and he’ll periodically give you a “test” – a Request that’s harder than usual, and if you pass it, he’ll up the difficulty level of future Requests.
Friendship
Friendship is both a kind of Event chain, and also a game mechanic. The more you interact with a PC, the higher their Friendship level with you. The Friendship level is pretty much just a milestone for Events tied to that character. Usually, talking to them is enough – go find them on weekends every week and chat them up. That goes for NPC’s as well. Anyone named you should just go talk to once a week and see if there’s something new going on. The Shopkeepers, the Librarian, everyone. Heck, just everyone, there’s just not very many human beings in this game.
Friendship Points & Events
When you go into your menu and select Status to view your characters, on their screens, you’ll see a number in the corner, that’s your Friendship level. It will be from 0 to 100, and either black or red. Black means that giving gifts will matter, and red means they’re hung up on an event trigger to move them forwards, and giving gifts won’t matter. Sometimes it’s not possible to move them any further until the plot moves.
Unfortunately, some NPC’s also have Friendship levels and you can get events by giving them presents, too… but there’s no way to check those numbers. For that, you just need to keep tabs on the Events lists.
 |
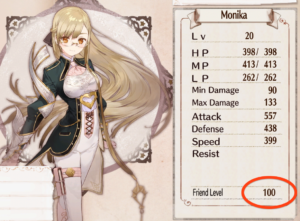 |
Gifts
When you go up to a named person with an Event tree, including your PC’s, you can give them a present instead of talking to them normally. Use the Square button instead of the usual X button. This may not be available immediately in the plotline.
 |
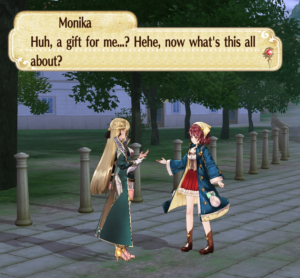 |
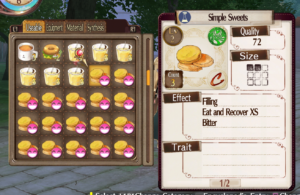
From there, give them anything of yours in your inventory. Yes, this permanently uses it up, so don’t give anything unique, results are not tied to worth. Each person has a couple things they really like, just give them one of those. A list of Gift items is here. If you have things they like in your inventory, they’ll all have a little pink happy-face next to them, though. Monica and Oskar both like Simple Sweets, for example.
 |
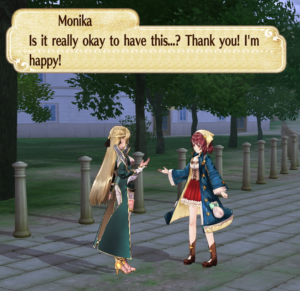 |
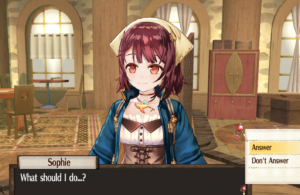
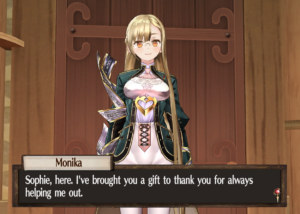
After you give anyone anything, a few days later, usually during synthesis, you’ll get a knock at the door. Always open it, it’s never an axe-murderer. The gift-receiver always visits you and gives you a gift. Usually something completely useless and inappropriate, like some random material. It’s like when the family cat leaves you decapitated mouse heads and bug parts at your bedside, except this gives you points towards something, and you don’t have to clean mouse guts out of the carpet and patiently wait until the hairball comes up later in the middle of the night with the rest of the mouse in it.
 |
 |
 |
 |
Exploration
Most of the game outside crafting is for the purpose of exploring, which in turn is for collecting materials, either lying around or inconveniently located within the soon-to-be-corpses of beasties running around. Uber-late game will be all about killing the best beastie on the bestest difficulty level, but that’s a long way’s off. Usually, you need to either:
- Clear out a new area of all the new materials or monsters, so that you can unlock a new recipe
- Or, specifically search known areas for more of a particular material you need for an existing recipe
- Or, less commonly, finding a specific item in a dungeon, like the later Cauldrons
This means traveling around to new areas, collecting stuff, and then returning – always returning. I’ll cover battle in the next section, so here we’re going to focus on just moving around and collecting stuff.
Menus and Maps
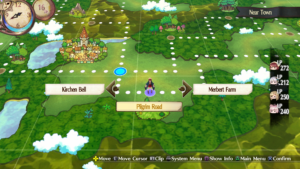
The first thing to note is this counter called LP. If you’ve ever played any RPG before, you know about HP and MP, but this is your “exhaustion counter”. When it runs low, your characters start whining about being tired and wanting to go home. You start doing less damage, taking more damage, and finding less useful stuff in the field. If you hit zero, you basically die and wake up in your Atelier sans some of your collected items, which sucks. So try not to run out. You can find the LP on the right hand side here on the first picture, though you’ll start out with way less than 200+.
The next thing to note is that you can hit Option on the World Map to bring up an important menu, from which you can rest, save, load, change music, or change clothes (later in the game, and this doesn’t really affect anything).
 |
 |
Instead of Option, if you hit Square, you can see a bunch of info about the board, like what materials you can collect, and what monsters there are. Once you visit a place, you can also see this for any location in your Encyclopedia at any time. You can also move the cursor to point elsewhere and view this with Square, without having to move there first.
 |
 |
Once you click to enter an area, you can start running around and doing things. Note that areas look and act a little different based on both the time of day and the weather. If you want to change the time of day, you can select Rest in the Option menu mentioned before. To change the weather, just leave and come back and it will change. Enemies as well as gatherables all differ based on night/day and sunshine/rain.
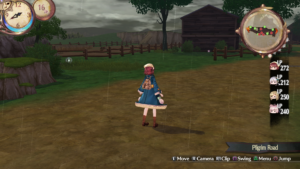 |
 |
 |
Gathering
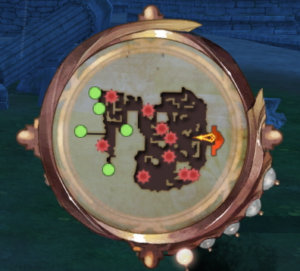
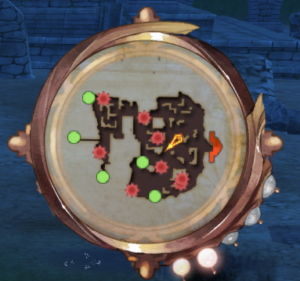
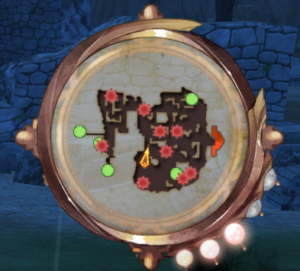
Note the minimap in the top right of the screen. The green dots are things you can collect, red dots are enemies, and sometimes you see gold dots which are treasure chests. You also will see red and yellow things that look like a curly-brace { here a red one at the top and a yellow one at the bottom and smashed against the 4 o’clock position. Those are exits. Red is an exit to the World Map, yellow is an exit to another sub-area within the area. All maps in Atelier Sophie fit precisely into the minimap, even if they have to shrink to do so. The gold teardrop is Sophie, and it points in whatever direction she’s facing. Not the direction of the camera, the direction of the character.
As to gathering things, just run up to the glowing dots lying around (or chests if you find some) and talk to them. There’s no way to tell what’s there until you try, though gathering spots don’t generally change location, and if you return to the same one, there’s a finite number of things you can find at that spot. You might not get the same exact set and number of materials each time, but some spots provide some selections, and others provide others. Gather everything once to see what is where, though some gatherables are rarer than others. And, again, they change from day to night and rain to sun.
Also note that after you collect them, they appear in your Basket, which you can see from the Menu. You can sort them or even throw them out from there. Why would you throw anything out? Well, you have a limited carrying capacity, and eventually it’ll make you chuck stuff when you run out of room, until you return home to drop them off in your much bigger storage there. In the below image, it says there’s 95 slots left, but you’ll have less until you get a bigger backpack. You can also get a Living Cart to put stuff into it and send it home with some of your stuff, so you can keep collecting. We’ll cover Exploration items in a minute.
Also, every time you gather (or fight a battle), time passes – about a game-time hour. When you pass into another time-period, like day to night (or if the weather changes, as it sometimes does), all the gathering spots come back (as well as all the monsters). Also, every time you gather something, if you previously defeated any monsters, one respawns. If you kill 3 and gather once, one returns, then another, then the last, but you can’t spawn more than there were originally no matter how many times you gather.
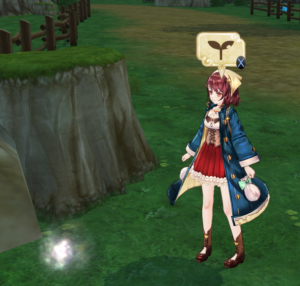 |
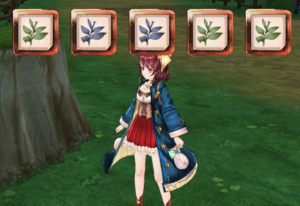 |
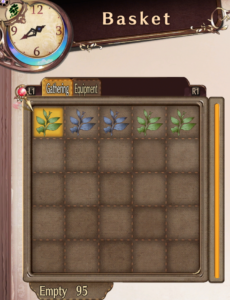 |
There are some areas that are slightly raised, and you need to jump onto them. Not a ton, but enough that you’ll need to do it on occasion. And note that going from one area to another requires hitting the talk button. So if you’re running away from an enemy, you will “run up against a wall of air” while trying to get to another area if you’re not careful.
 |
 |
As you run around and gather things (or run into battles, which we’ll get to soon), you also increase your “gathering level”. This is represented by the 5 little light-bulb things on the bottom-right quarter of your minimap, which you might not notice unless you know to look for them. See the 1-2-3 below? Every 6 times you pick anything up, or every 6 battles, your level goes up 1. Unless you have a Victor’s Charm with the Seal of Chaos Effect on it, in which case it goes up every 1 gathering or 2 battles.
What does “gathering level” do? Two things:
- The quality and rarity of the things you gather go up
- All the monsters get stronger, until level 5 when they’re literally double as strong
Be careful. If you’re in an area with particularly nasty enemies, they get even nastier with high gathering level. On the other hand, you get better stuff, too. That includes the amount of gold and the quality of items you get from battles. When you see any other blog posts out there about beating hard enemies on “gathering level 5” or “5 lights”, this is what they mean.
 |
 |
 |
Also note that monsters get harder at night time, and harder monsters make entrances at night times, both. In addition, some monsters only come out during sunshine or rain or even nighttime thunderstorms. And certain areas only open up at certain times. In particular, it’s a minor spoiler, but if you want to get back into Soul Space after the first time, you must arrive at the special cauldron during the day of Seed – don’t leave your Atelier on Seed or you won’t make it on time, the clock literally must still show Seed when you get there, or the portal gets locked off for another 4 days.
Exploration Items
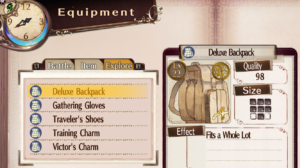
Now onto Exploration Items. We’ll cover other Equipment a little later on, but Sophie and Sophie alone has a third tab of things she can equip, and these are “Exploration Items”. They help out with gathering and such. Although there are others, the ones here are honestly the only ones I use. And the better you make them (with better Effects) the more useful they are. The only one that you might want to watch out for is the one I mentioned earlier – the Seal of Chaos Effect on Victor’s Charm – that makes battles hard really quickly. However, it’ll be a long time before you can max that out, and first you need to make sure to collect a 4-size High Class Talisman, to boot, which I’ll remind you about in the final section of this guide.
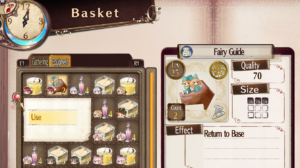
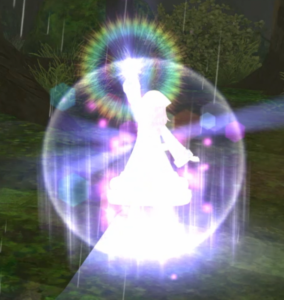
I’ll also mention one other item – the Fairy Guide. It’s not an “Exploration Item”, it’s a regular usable item like a bomb or a healing potion… but it’s extremely useful and basically functions primarily during gathering. It’s an “instantly teleport back to your Atelier” item. As soon as you can make one, do so. To use it, go to your Basket, second tab (for equipped usable items), select it and click “Use”.
 |
 |
 |
 |
Exploration and Enemies
We’ll worry about what to do in battle in that later section, but as for interacting with and avoiding enemies, here are a few things to note. When an enemy notices you, a big red exclamation point (!) appears over their heads, and they make a bee-line straight for you. All enemies except one are aggressive. Gold punis go berserk and roll around in random directions really, really quickly – faster than anything else in the game. You have to run after them to catch them. However, some enemies that make a direct line for you are also pretty fast – be particularly mindful of the cat-wolf-ish things with long tails, and the gigantic birds. Both of them can close the distance with you quickly.
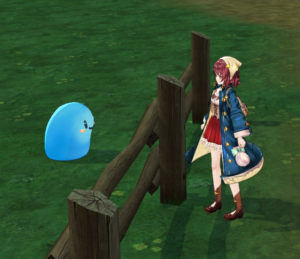
One thing to note is that all enemies are very, very stupid, and if you are barely out of their immediate line of sight, they un-aggro immediately. They also don’t tend to hear you sneaking up on them, so if you notice their movement patterns, it’s really not that hard to walk behind them and then hide on the other side of something. Note that cliffs might as well be walls, and see-through fences are walls, too. You can see them, but they just will stare at you blankly and drool.
Note: regular enemies you really need to literally smack into, but bosses you might be 10 steps away and still get sucked into battle, so be wary.
 |
 |
Also note that you can tell that a “boss” type character is around, if one of your teammates tells you to be careful, or if you have a Han Solo “I have a bad feeling about this” moment by yourself.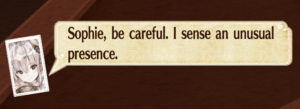
There are a bunch of different features on the World Map that are not explained very well. First of all, as a reminder from the Rumors and Requests section, if an area’s dot is glowing with a blue star, that means there’s an active Rumor there. Those time out fairly quickly, so best to deal with them relatively soon. If you see a hovering red scroll icon, that means there’s a Request there. Scrolls will appear anywhere you can do something to fulfill a Request, not just the place mentioned in a Request. So if you need to kill X to meet a Request requirement, but you can find X in 5 different locations, then every one will have a scroll on it.
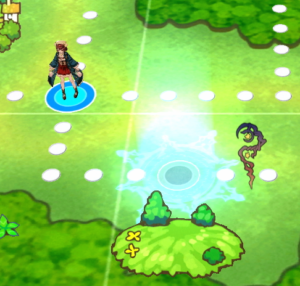 |
 |
One fish, two fish, red fish, blue fish. Er. Beige dot, orange dot, white dot, red dot. (And yellow dot.) The white dots are clearly the possible paths you can walk on, and yellow dots are just paths you haven’t walked yet – you won’t see many because they turn white once you use them even once. Sometimes, red dots appear along paths – those are surprise encounters. 90% of the time, it’s either an LP refresh or some free gold. But 10% of the time it’s a battle. As for the dots that sit at the areas’ entrances themselves – some are beige and some are orange. This just tells you how big the area is. Beige ones are single-subarea areas, orange ones are bigger – they have at least two subareas, like a basement, cave, or second field. Dots, dots, everywhere, but not a drop to drink.
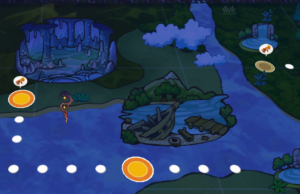 |
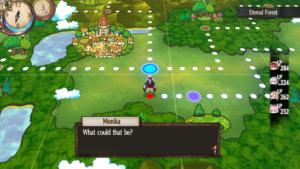 |
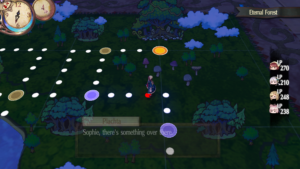 |
Equipment & Items
There isn’t a ton to talk about with Equipment and Items, they’re pretty straightforward. Every character can arm 1 weapon, 1 armor, and 2 accessories. Every character can arm 5 usable items. Outside of battle, you can use items that are currently armed on any character, but during battle, each character can only use items that they individually have armed. There is no shared item pool like in a lot of RPG’s.
Everyone can use every accessory, but that’s the only universal. Each character has their own set of weapons that do not overlap at all. Characters cannot all wear the same armor, but there is some overlap. And not everyone can use the same items. In fact, only Sophie has a really good set of usable items, everyone else is significantly restricted in that way. However, everyone can use at least a few kinds of healing items, and a few kinds of attack items. The full breakdown of all weapons, armor, and items, and who can use them, is over on the Charts page.
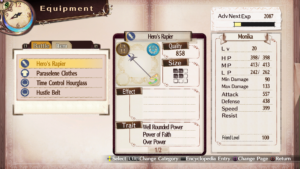 |
 |
In addition to the restrictions of items to certain characters, there’s also “Equipment Cost” – see the 99/105 in the right photo above. Each item basically “takes a certain amount of space”, and you can run out of room. This applies only to usable items, not weapons, armor, accessories, or exploration items.
All the weapons, armor, and accessories people wear contribute to their stats via their basic stat bonuses, plus their Traits and Effects. Items do not contribute to stats at all, and neither do Exploration Items for Sophie – even if there are Traits on them.
Weapons & Armor
In the early game, you can’t make any, and even when you can, the materials are pretty expensive or you can’t make them for a while. It’s a bit into the game before this becomes a feasible thing to do. For the beginning of the game, better stats can be easiest achieved with just accessories. Especially if you manage to put together any of the stat enhancing ones like ATK DEF Enhance, or the combined ones like All Stat ones or Well Rounded Power. If you manage any of those, put them on your accessories and arm them right away, they’re close to game-end, and will be worth way more than arming a better weapon or armor.
That being said, by mid-game, you’ll need to venture into some areas where you wouldn’t want to fight some of the enemies without being prepared. So by then, you’ll have met the armorer Leon and the blacksmith Logy (who has been in a lot of Ateliers).
 |
 |
Crafting
At first you can only buy, then you can Craft, then you can Enhance. Crafting armor is like a super-simplified version of Synthesis. Just like alchemy, you have a certain number of ingredients – here they’re just in a vertical list instead of a horizontal list. It immediately tells you the list of Traits that will flow through, as you go. And… that’s it. There’s no Effects, no bonuses, not even any placement. Once you pick the ingredients, *poof* the weapon or armor appears. I only show a weapon below, but armor is literally identical. Full list of Weapons and Armor, who can wear them, and the ingredients of each, are on the Charts page.
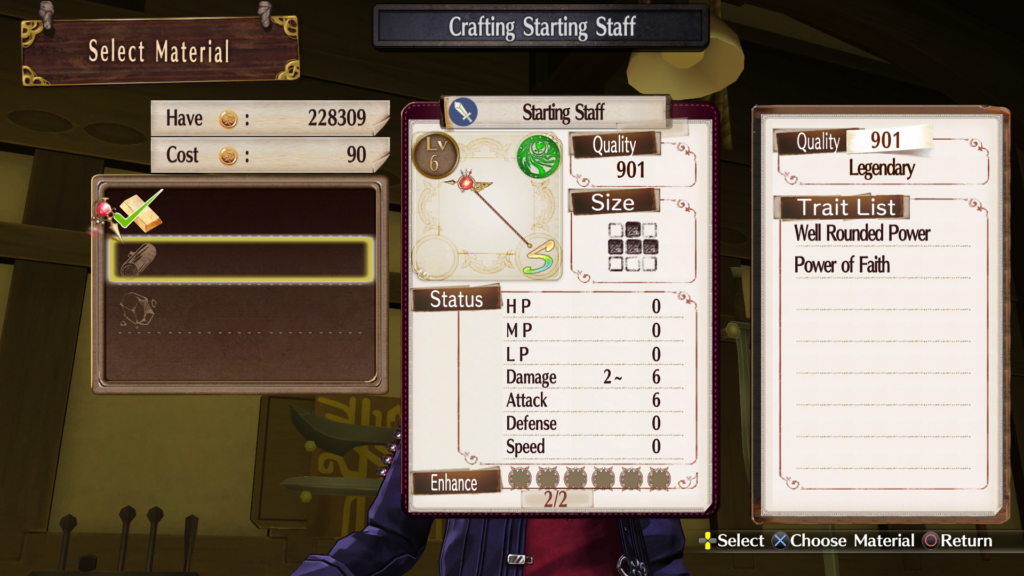
Enhancing
Enhancements are the next thing to do. At a basic level, they’re even simpler than crafting armor or weapons. Select an item, select an ingredient to use to enhance it, and that’s it. It does take money though, lots of money, it gets very expensive at high levels. How much does the enhancement increase the stats of the item by? Well, each item has it’s own base values, and then Traits on the items can also enhance that. Generally, you use the highest level of either (Cloth) or (Weapon Mat) you have. The relative qualities of those materials are, in increasing value:
| 1 | Ingot | Cloth |
| 2 | Stahl | Mofcott |
| 3 | Silvalia | Adal |
| 4 | Rubilium | Flugel |
| 5 | Golt Aizen | Fairheit |
| 6 | Harmonium | Velvetis |
And the bonus to stats gained by having each of these Traits is as follows. These are cumulative:
| Evolves Body: (except DMG) +5 | Skill Boost: (except DMG) +3 |
| Tenacious Body: (except DMG) +5 | Saving Skills: (except DMG) +3 |
| Super Skill (DLC): (except DMG) +5 | Skillful Attack: DMG +3 |
| Persuit of Knowledge (DLC): DMG +5 | Deadly Attack: DMG +3 |
| Skill Super Enhance: (except DMG) +4 | Dreadful King (DLC): DMG +3 |
| Expert Skill (DLC): (except DMG) +4 | Increse Aggression: DMG +2 |
| Well Rounded Power: (except DMG) +3 | Avidya Attack: DMG +2 |
| Develops the Body: (except DMG) +3 | Barrage Attack: DMG +2 |
| Skill Power +10%: (except DMG) +3 | Persistent Attack: DMG +2 |
| Changing Attack: DMG +1 |
So when you put a bunch of Traits on a Harmonium or Velvetis, you can use that to enhance an item and get around +10 to all stats, more or less, with decent Traits involved. When you enhance something, it uses up an enhancement slot on the armor or weapon – located at the bottom of the item description, those 5-6 gray circles. When they fill up, the item can no longer be enhanced.
However, every time you enhance an item, a couple things happen: the enhancement cost goes up, and the amount it enhances the item goes down. That’s a pretty crappy trade, right? Luckily, there’s a way around this. If you enhance another item, any junk weapon or armor will do, you can use that to enhance the item you want, instead. What this does is make sure that all your enhancements are “first time” ones, so they don’t get weaker or cost extra.
Some caveats: it has to be done in a specific order, and the number of enhancements you can do, if you do it this way, is one less than you would be able to normally. It still comes out to much better stats, though, but be careful. Also, you need to use temp/junk items that can hold one more than the item you’re really trying to enhance. In my example below, I’m enhancing a Parselene Clothes, which have 5 enhancement slots. That means I need to use a bunch of cheapo Hard Coats that have a number of slots one greater: 6 slots.
Here’s the order.
- Make a junk item and enhance it directly twice, we’ll call this A2
- Make 4 more junk items and enhance each one once, let’s call them B1, C1, and D1
- Use A2 as an enhancement item on B1
- Use the newly-enhanced B1 as the enhancement item for C1
- Use C1 on D1
- And finally enhance the actual item you want with that D1
- If the end-item only has 5 enhancement slots, then you can only make and use up to D1
Another way to put this, because this seems to confuse people a lot, is that every item has two enhancings, but the total that it “contains” grows:
- Enhance A2 twice normally (so it’s “worth” two)
- Enhance B1 normally once and then using A2 (1+2=3)
- Enhance C1 normally once and then using B1 (1+3=4)
- Enhance D1 normally once and then using C1 (1+4=5)
- Then finally enhance your actual weapon or armor once only with D1 (which is “worth” 5)
Here’s a video of max-enhancing an armor. Note that I jitter back and forth between the coats to show which one I’m selecting to shove into which – pay attention to the stats that are different, that’s how I’m able to tell which is which when they’re all just Hard Coats visually.
Battle & Skills
Time to kick ass. Sakura’s Clow Key hungers for blood — er, Sophie’s staff wants to club some punis on the noggin. I left this section until absolutely last because it’s not a huge part of the early game, and frankly, you need to know about all of the other things first. The couple times you might end up fighting early on are probably some puni and you’ll stomp them even if you just mash the button and select attack for everyone. However, after a while, you definitely need to be able to hold your own, and there’s a lot of moving pieces in battles, including some features that are truly unique to the Atelier Sophie battle system.
One thing I’ll mention right off the bat, though, is that this is a team-based turn-based system, and that all characters select their actions before any characters take their actions – it’s not one selection and an immediate effect. This is different from Firis, for example, where it’s one character turn at a time.
Let’s go through step by step, starting with literally the action of starting a battle. You initiate battle by running into an enemy that’s running around, or smacking it with your vorpal puni-whacker, or getting too close in the case of a boss type monster (where the engagement radius is bigger). It’s always preferable to smack the enemy, if you’re going to go into battle, as you get a bit of a speed boost on the first turn, kind of like an “surprise attack”, though it doesn’t always amount to attacking first if the enemy is really fast itself, it’s just a boost. Also another reminder that you can tell if what you’re about to face is a boss by whether you get “warning” speech bubbles from your teammates.
 |
 |
An interesting note – the enemies that you see running around are not the only ones you fight. Often, there are ones that “come along with” those displayed monsters, once a battle starts. Although I find the terminology a bit weird, it’s the way it’s documented in a number of places, so the monsters that you “see” on the screen chasing you are called “symbol” monsters, and the ones that come along for the ride once you start battle are “partner” monsters. That’s the way they’re annotated in the Locations Charts and elsewhere on the interwebs.
Basic Battle Interface
Let’s look at an overview of the Battle screen next. The bar on the left is the Turn Gauge, similar to the order of effects readouts in a number of other games – though to me most famously in Final Fantasy Tactics, where you could see when, relative to allies and enemies, a particular attack would take place. There’s a lot of icons and such on that, and we’ll get to those soon. We’ll get to the Chain Gauge in a little bit, too. Clearly the players’ HP (red) and MP (yellow) are at the bottom, and the enemies are selectable at the top, and the enemies are displayed at the top, but their details are only displayed when they’re selected.
While selecting things, here’s one of the two options you have, called Stances: Offensive or Defensive. Each person can choose either one, and it doesn’t limit anything. You can be Defensive and attack, Offensive and defend, or any combination. It causes two things to happen that are somewhat irrespective of what your action choices are: if you’re in a Defensive Stance, you take less damage and help defend allies that are also Defensive, and in an Offensive Stance, you do more damage and help allies attack that are also Offensive. That’s the key – a Defensive ally won’t help block for an Offensive one, nor will they help an Offensive ally attack, nor vice versa.
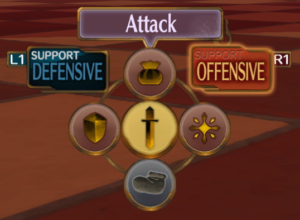 |
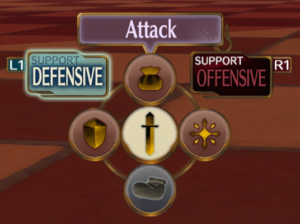 |
So how about the other icons there? Those correspond to Attack, Defend, Item, Skill, and Run. Attack has no submenu, but you do choose a target. Defend and Run you do actually have to choose a target – yourself – which is kinda stupid because there’s never really an option, but it’s the way it is. Item and Skill have submenus in addition to needing to select targets. Note that sometimes one or more of these 5 options are grayed out – like the Run option in all but one of the pictures below. That means it’s not selectable. For example, you can never run from a boss battle – it’s do or die, literally. Some status effects also block some action options.
The two actions with submenus are Item and Skills. Items will contain whatever the current character’s own personal items are equipped. This is a reminder that there is no shared item pool – only what you put in the second tab of a character’s Equipment page is accessible during battle. And note the uses per item – the 2, 3, 4, and 5 on the item icons, or the Count 2 for that first selected one – this is how many of them can be used before they run out. Early in the game, going to 0 means the item disappears, but later, it stays at 0 and you can refill it. See Replication & Refills section for more on this.
Skills are basically spells, and you have a very limited set per character. You start out with only 1 or 2, you learn the rest at fairly early levels, and you can eventually upgrade when you hit the max level plus some. Under the menu it tells you exactly what it does, and the number to the right is, as expected, the MP cost of one casting.
 |
 |
When you select Attack, and Item, or a Skill, you select the enemy or area of effect for that action. It displays not only as a blue-purple border under the enemies, but also as a gold highlight and the word “TARGET” on the Turn Gauge. This way, you can either line things up visually, checking to see what blinks as the target, or line it up using the Turn Gauge, in case you want to attack “the next enemy that will attack in turn” or “the last enemy” etc.
 |
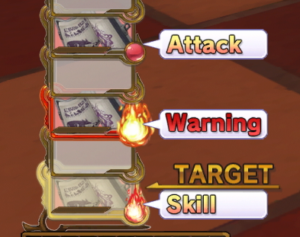 |
 |
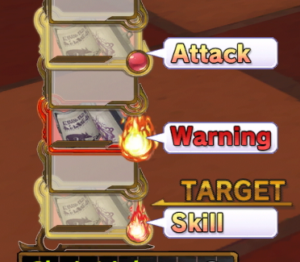 |
While you’re deciding what Stance to take, and what actions to select, do pay attention to the enemies as well. You get a lot of info out of the Turn Gauge on the left. Each enemy’s relative turn order is there, as well as exactly what kind of attack they’re going to make. Attack is a physical attack, Skill is a spell, and Warning is whatever their most damaging effect is. Use this to plan accordingly – change stances or pick Defend as needed, or even focus all targets on the most damaging one if you think you can kill it in time. There may be other icons on the gauge, but let’s stick with these for now.
When you’re just about to commit to an attack, after selecting everyone’s actions, the lines between them show what their relationships are. If there’s more than one Offensive ally, they’ll have red lines between them, and if there’s more than one Defensive ally, blue lines. If you’re sure about all your selections, which you can see on the Turn Gauge, and decide whether their order with respect to each other or the enemies is ok, click on Yes.
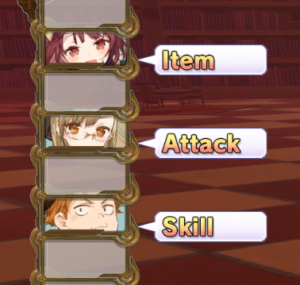 |
 |
 |
After that, all the attacks on the Turn Gauge happen, in order, unless of course an enemy or player dies or is incapacitated before they get a chance to take their turn.
Chain Links
As you perform actions, slowly, your Chain Link Gauge increases at the bottom-left of the screen. This is not the same thing as it saying “Chain” at the top right of the screen during multi-hit attacks. The bottom-left one goes up with every hit, even if it’s not a chained-one, though it goes up faster if you chain hits. The top-right one is how many individual smacks a single enemy has taken so far in a row – the higher the Chain number, the more damage and the more likely to get a Critical or Break, which we’ll go over under Status Ailments.
 |
 |
The exact number in the Chain Link number on the bottom-left isn’t significant, 120% and 150% aren’t different in any significant way. However, it does matter which 100% multiple it has crossed. Above 100% means something, above 200% means something, and 300% (the max) means something. Each one of these you cross means that allies start team-attacking or team-defending in stronger and stronger ways.
Basically, once you hit 100%, every time someone attacks, the previous ally that attacked also gets a shot. This is called a “Support Attack”. Once you hit 200%, every time someone attacks, the previous two allies also get an extra pot-shot, also a Support Attack. And when you hit 300%, when your fourth person attacks, then you get a “Special Attack” where everyone gangs up to do extra damage in one combined team attack. You’ll notice that the Turn Gauge reflects who’s helping whom during these attacks. Also note that executing one of these Special Attacks uses up your Chain Link Gauge, and you’ll have to fill it again.
Note that you don’t get Special Attacks (or Defense) until level 10.
 |
 |
 |
However, note that when I say “allies” above, I mean only “allies that are in an Offensive Stance”. Yes, this is the second purpose of the stance, other than the bonus damage (or bonus defense for Defensive Stance). If you only have 3 people in an Offensive Stance, you can only execute 3-person things, and you’ll never get a Special Attack. 2 people in Offensive Stance? At most the level-1 Support Attack.
 Support Attack (1 ally, 1 helper) Support Attack (1 ally, 1 helper) |
 Support Attack Lv2 (1 ally, 2 helpers) Support Attack Lv2 (1 ally, 2 helpers) |
 Special Attack (4 person) has a special animation Special Attack (4 person) has a special animation |
 Special Attack (4 person) has a special animation Special Attack (4 person) has a special animation |
What about allies in Defensive Stance? They do kind of the opposite. If one ally has taken a turn, and the Chain Link is at least 100%, then when someone in Defensive Stance is attacked, that previous-turn ally will jump in to take the hit for them, and they’ll take less than usual damage for it. If two allies have taken a turn and someone gets attacked, and Chain Link is at least 200%, then two allies will jump in to help. And if 3 have taken a turn and Chain Link is 300%, you get the equivalent special animation from the attack mode, but a super-block instead of a super-attack.
On one hand, this is really powerful, and if you are fighting a big boss and it’s about to do it’s most powerful attack, this can help. On the other hand, some bosses spam massive attacks so often that the strategy needs to be “kill them before they kill you”, so I found limited use for defensive stances and special blocks. However, Your Mileage May Vary(tm).
 Notice the arrow points up, meaning someone Sophie (bottom) is defending Monika (top). Notice the arrow points up, meaning someone Sophie (bottom) is defending Monika (top). |
 |
 |
If the animations are too long for your taste, a tiny “Skip ON” is at the bottom right of the screen, waiting to be activated with the Option button.
Status Ailments, Buffs & Debuffs
There are a number of positive and negative status effects in Atelier Sophie, and a they’re displayed in a number of places, and not explained all that well. There is a big encyclopedia article that you can look at that has a bunch of information on it, though. As soon as you encounter a status ailment in the game, you’ll see it. The front page is particularly useful – also take note of the icons, because they pop up elsewhere:
The basic meaning of them is as follows:
- Poison – moderate damage each turn
- Slow – low SPD, slower on the Turn Gauge
- Blind – low HIT% and low EVADE% both
- Weak – low ATK and low DEF both
And then the 4 really nasty ones that you don’t want on yourself, but do want to inflict on enemies:
- Immobile – can’t take a turn at all, doesn’t even get a prompt during battle
- Seal – Can’t do skills or items
- No Heal – healing reduced to 0HP
- Curse – healing does damage (like Zombie status in Final Fantasy)
Plus a few that are not mentioned on this screen, or really anywhere:
- ATK down
- DEF down
- LVL down
- MP Cost up – magic costs more to cast
- Swoon (low health)
Then there’s two stati that are not listed here, and both are really important:
- KO – duh, you can die
- Break – this is super important and a major focus of the battle system
And several positive statuses as well:
- ATK up
- DEF up
- SPD up (Haste? the opposite of Slow anyways)
- LVL up
- Auto-revive (If you die, you auto-revive, like Auto-Life in Final Fantasy)
- Regen
First let’s have a little bit of a look at how these appear on the screen, because they’re unfortunately not in the same consistent location. They also blink and rotate annoyingly, so there’s no good way to tell at a very quick glance who has what conditions. These aren’t all of them, but they do show some of them that will blink on your character portraits on the bottom of the screen. They cycle through slowly if there’s more than 2 on a character.
In addition to seeing status icons on your characters, you may also see them on the enemy as well Look to the left of “Lv”:
| LVL- |  |
| No Heal
DEF+ |
 |
| No Heal
SPD- |
 |
Those cover everything except KO, Break, and Swoon. KO has no symbol – your character’s HP just turns red, and it’s pretty obvious that they’re dead. Swoon has no symbol, per se, but the character slumps over and whines when you select them and give them commands. There’s not specific effect that comes from Swoon, but you do get one recipe from beating a battle with everyone in Swoon mode, so I figure I’ll mention it.
Regen has no icon, neither do a whole bunch of others that I can’t even list, because almost any stat can have a buff or debuff in this game – I’m constantly running into new ones I never saw before. MP Cost up, for example, makes the target’s spells cost more MP (duh). Max HP down? Also duh. Usually they’re straightforward, but I don’t have a full list because it seems like every stat is up for grabs.
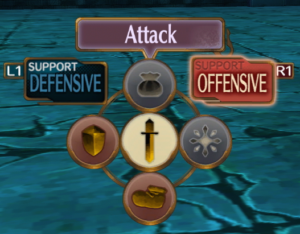 Effect of “Seal” Effect of “Seal” |
 Slumping over in low-HP “Swoon” Slumping over in low-HP “Swoon” |
 MP Cost up MP Cost up |
 Max HP down Max HP downI never even saw this one before, I ran into it while writing this guide. Crazy. |
In battle, you’ll know you got a positive or negative status ailment from the words that pop up on your character. They’ll be orange (sometimes with an up-arrow) for positive, and purple (sometimes with a down-arrow) for a negative.
 Ailments: Blind, Slow Ailments: Blind, Slow |
 No Heal, Curse, Poison, Blind, Slow, and Immobilize all at the same time No Heal, Curse, Poison, Blind, Slow, and Immobilize all at the same time
Otherwise called “Oh Shit” |
 Debuffs: SPD-, DEF-, ATK-, Seal Debuffs: SPD-, DEF-, ATK-, Seal |
Two remaining Status Ailments: +/- Level, and Break. First the easy ones: the Level ones literally strip or bolster your character level (or enemy level). That’s basically a boost or reduction to all stats. You want to avoid Level Down at all costs, and you want to add Level Down to enemies if you can manage to do so, it’s a very strong effect. The Sealing Book can manage to debuff a lot, and one Effect on it can reduce Level. Watch out, a lot of enemies have a Level Up effect that they use on themselves when they’re almost dead – kill them fast after this or they will eat you alive. The damn lord of the Ocean beastie that’s in a Rumor will flop and stomp and roll you into oblivion after he does this to himself.
Finally, Break.
BREAK.
Avoid being Broken, and Break the enemy when at all possible. Some Effects make one resistant to Break, or more likely to Break the enemy. You want all of it. What’s Break? It’s like Immobilize, it means the character or enemy is completely unable to move, but also takes way more damage. You want to time Breaking an enemy with your higher Chain Link levels or maybe even a level-4 combo or strong item or two. You’ll do as much as 10x the damage, but the effect doesn’t last long. It’s so powerful that you should consider structuring your entire strategy for bosses around when and how you can Break them.
Breaks happen normally over time as you wail on an enemy (or them on you). There’s a bar on the Turn Gauge that shows how much of a beating you’ve taken, and when it fills up with yellow all the way to the right, that target is Broken, gets X’ed out, and doesn’t get any turns for a while.
 |
|
 |
Healing, Including Status Ailments
There’s not too much to say about healing. Some items heal one, some your whole party. No Heal and Curse stati we already covered, they prevent healing. You can’t heal a dead person. Not sure how much detail to go into basic healing. However…
How about healing status ailments? Well, healing items often “cure 3 status ailments” – which ones aren’t specified, and I’m not sure how it chooses them if a target has more than 3, but it’s a common Effect. Since No Heal and Curse do damage during healing, the way you get around this is by achieving a “Cure No Heal” or “Cure Curse” Effect on your healing items. Also, you can cure Break by getting an appropriate Effect or Trait on a healing item. There are also a number of accessories that prevent rather than heal many of these traits.
Also note that most healing items do not cure KO. You have to go out of your way to find Traits and Effects that cure KO. There are no phoenix downs. If you survive a fight, everyone’s resurrected, but during a fight, they need to be revived. Find the Full of Life and False Flower Traits to add Revive and Auto-Revive to your healing items.
Also note that when you awake from being Revived or Auto-Revived, you suffer from some resurrection sickness called “After Effect”. Basically you’re a bit weaker than usual for around 3 turns. However, there are a bunch of Effects or Traits that either cure or prevent this condition. If you look at the Effects section where I made a Life Bangle with Nullify After Effects on it, that’s one example.
Attack Effects
There’s two more effects, not quite ailments, but they’re important. Critical and Knockback. They don’t “stick” so they don’t quite fit in the above section on ailments, but clearly they matter.
Critical is just like any other critical in any other RPG. Low chance of happening, and high damage if achieved. There are many accessories that give bonuses to critical hit, however, be careful of Traits. The Critical+ and such Traits are for Items only – they do not work on weapons. You can (and should) make One Hit Kill, the ultimate Critical Trait, and put it on your bombs – that will either insta-murder any monster of your level or lower, or have a very high 60% CRIT% rate. However, the only Trait that gives a bonus is Power of Faith, from the Pious Talismans that you can buy from Pamela all through the game – that’s a huge bonus and only shadowed by stronger Traits much later in the game. There are also Traits and Effects that give more damage if critical, so if you are trying to boost CRIT%, you might want to look for some of those as well.
Knockback is possibly even more import that Critical. It pushes back the turn of the target if successful. If you do it enough, you can “juggle” an enemy and keep them from attacking for a long time or even ever. Anything with high knockback is worthwhile investigating, and Lightning-element items have a tendency to do a lot of Knockback.
There’s also one additional attack effect, and it’s not documented well, so I’m not 100% sure what it is, but I’ll mention it in case you see it. “Slip Damage”. I don’t see it much, though it seems to pair up with fire damage as far as I can tell, but it’s one of two things. It’s either very, very minor poison damage that will repeat itself for just a couple turns… or it’s nick/piercing type damage, as in, even if you have enough DEF to completely reduce something to 0HP, it still pierces through. However, I’ve never seen it do more than 1HP of damage at a time, so I wouldn’t worry about it too much one way or the other.
Resistances, Weaknesses & Strengths
Just like most RPG’s these days, there’s also elemental weaknesses and strengths. Briefly put, there are Fire, Ice, and Lightning in this game, and each has a weakness or strength. (Fire strength doesn’t imply Ice weakness – they’re separate from each other). Also Physical and Magical are elements, can be weak or strong, and don’t imply opposite weaknesses. The encyclopedia also has a good picture of this one:
Some characters can gain natural resistances, or wear things with effects that provide resistances.
You can also look up monsters in your encyclopedia, which gets updated as you meet new monsters, and also updated to reflect their locations as you meet them in new locations. For example, you can see the Gold Puni as having a blue flame with a down-arrow, in other words: Fire Weakness. (Also where they live, what their common, uncommon, and rare drops are, etc.)
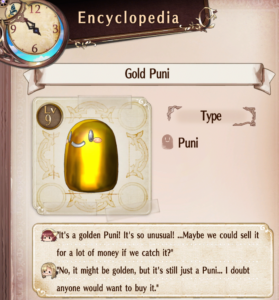 |
 |
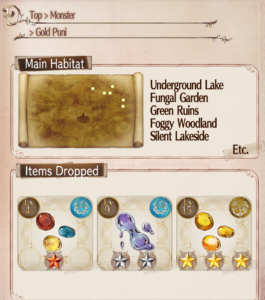 |
You can tell that you’re causing, or being hit with, elemental damage, based on the color of the damage. Red for fire, blue for ice, yellow for lightning.
 |
 |
 |
However, during battle there is no indication that a monster is strong to a particular kind of elemental damage, or whether the damage you’re doing is being resisted in any way. In Firis, there’s a way to tell, but not in Sophie.
Multi Turn & Automatic Effects
There are a number of effects that actually happen over multiple turns in Atelier Sophie. Attacks, heals, and status effects. Setting aside Poison and Regen, which I think every RPG player in the universe already understands, there are a few new things in this game that aren’t as usual. The first and simplest is the Auto-Revive status effect. If a character has this in effect and dies, then at the beginning of the next turn, they just “wake up from death”, usually with not very many HP, and can take their turn immediately (though they lose their turn when they die).
Next is an effect that’s not necessarily “multi-turn” as “non-turn”. There’s one very important Effect that you can get on a few healing items – Auto Activate. This means that, if it’s in your inventory, it uses itself. What triggers it? It depends on the Effect – if it says 20% like in the photo below, it means that when you hit 20% HP, you automatically use the item. This does not use up your turn, it’s in addition to anything else that you do during that turn. That’s highly useful, though you can use up the last of your item this way even if you don’t want to – you can’t turn it off. But it’s still very powerful.
Finally, both attack items and recovery items can have multi-turn effects. They are generally Effects called either Add Break or Activate Split. This means that once you use the item, it’s effect will happen on the next turn as well. Depending on the particular item and the particular Effect (some effects are stronger than others and last more turns), it can happen for up to 3 full turns. Imagine throwing a bomb and having it blow up 3 turns in a row while you do other things in addition. Also, imagine using a heal-all-characters item and having it repeat itself automatically for 3 turns while you do other things. Very powerful, definitely take advantage of these Effects when possible.
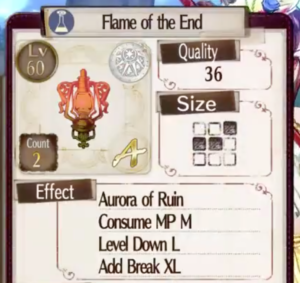 |
 |
Note that you can tell how many times it has left, and exactly when in the order of things, by looking at the Turn Gauge. It’s up there along with every character and enemy, every repeat effect gets it’s own slot, with a number next to it for how many charges it has left. Keep in mind that enemies can use this, too. In the below image, the first 1 and the 3 are both lightning bolts cast by the enemy that will hit me next turn and for 3 turns over and over. Further down is a bomb I threw at an enemy that will explode again next turn.
Gold, EXP & Rewards
Upon winning a battle, the first screen you get is the usual RPG staple: EXP and GOLD. Everyone in the battle gets that same EXP, even if they didn’t participate or if they died. However people not in your party get no experience! Yes, it’s one of those games. At the beginning of the game, a lot of enemies don’t give any gold – it’s quite annoying. You have to level up a Training Charm to make sure you get consistent money.
Sometimes you get “bonus” money. This is not documented well and I’m not 100% sure exactly what this corresponds to, but it appears to be a “battle done really well or fast” bonus. I have managed to get it on Easy, so it’s not restricted to only higher difficulty levels, but when I did, I killed a Dragon in 1-2 turns with less than a 4-person party. Anyways, sometimes this appears and I don’t know why and it’s cool.
If any characters happen to go up a level, you get an animation for each one that does so, during this EXP screen. You can hit the X button to move forward to the next person. It shows you in red how much a character’s stats go up. As far as I can tell, these stat ups per level are not randomized, so there’s no need to reload to get better levels or anything. Your weapons and armor and enhancements are going to count for way more than this anyways.
After that, you get the spoils of war screen. You can just confirm that you want all the stuff, usually. Though if your basket is full, then just like gathering, you’ll have to dump something. Monsters have set drops, you can find the list over in the Monster Charts.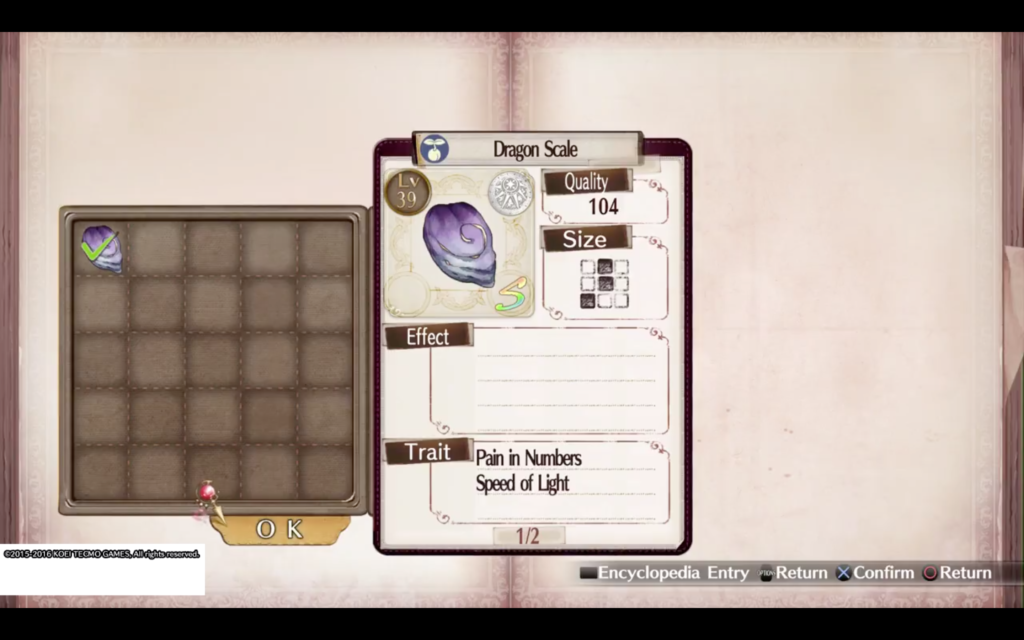
After the spoils screen, you go back to the map. However, sometimes the enemy drops a treasure chest. If it does, definitely grab it – it’s usually way better stuff than the spoils.
A few things about levels in this game – they have a very, annoyingly low cap. 20. Yeah, you can’t go over level 20. That’s pretty insane, but it’s the way things are. Once you hit that point, you start getting “Adv Point” levels. They actually pile up pretty quickly, faster than regular levels. These are basically a form of ability point, with which you “buy” additional skills and stats. Go to your status screen for a character and hit triangle to get to this screen, but only once you max out the level for that particular character. Eventually you get all the skills (which are more worthwhile than stat points initially), and you can start buying stats. However, eventually these max out. There really is a max max for a character.
Also, another of a bit of an oddity – sometimes the math for going just past Lv 20 goes berserk, and you end up with negative EXP on your level-up screen after a battle. Your yellow “exp progress” bars are literally aiming left. I can’t explain this one. All I can say is that you do dig out of the hole after a few battles, and it does rectify itself – you don’t need to reset or anything, it is not a corrupt game. I’ve even had it happen a couple other times since, but only for a battle or two. Weird. But harmless.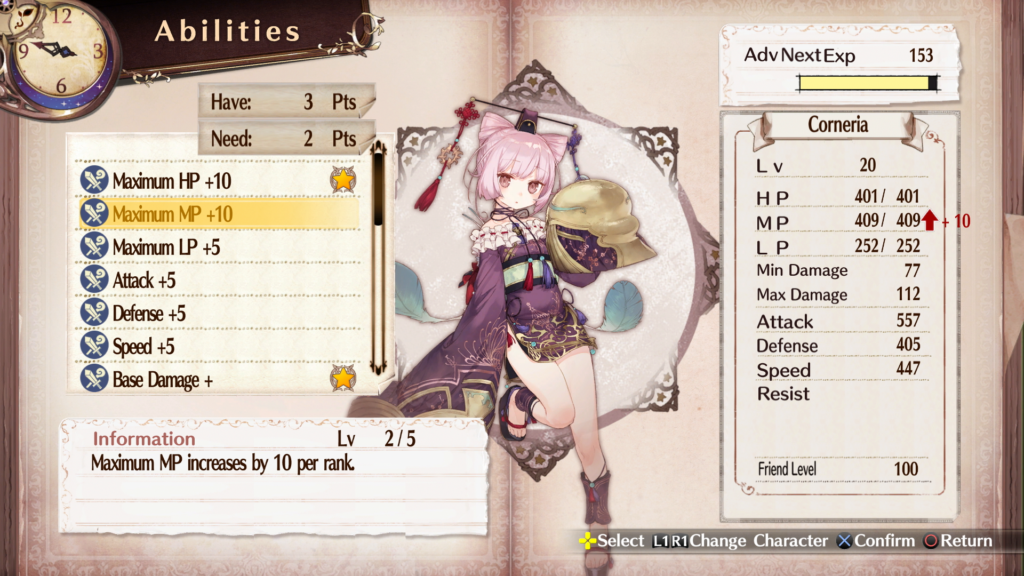
Death
Eventually, y’all are gonna die on a boss at some point, maybe even on some rando as you’re trying to pick the friggin flowers.
Though with auto-revive, it’s hard to die sometimes, I have to say. However, if everyone dies at the same time, even auto-revive will not trigger.
When you do, don’t worry, this is the least impactful death in any RPG, ever. You wake up back at home, with all your levels and gold intact, just missing some percentage of the stuff that was in your gathering basket at the time of death. So if you run off to beat a boss and don’t collect anything and die, you lose nothing. If you die accidentally while collecting, you lose a few of those things at random. It is annoying when you have a rare drop and lose it to death, but it’s pretty rare.
Doll Making
I’m going to mention this only briefly, because it’s in the spoiler zone, and this Guide is supposed to be mostly spoiler-free. In order to get more “Doll Outfits”, you need to place specific items on the doll. Each item has a certain amount of Cute, Brave, Fool, and Wise value, and when they combine, they end up choosing a new doll form with enhanced abilities. In addition to this, the Traits that are on the materials that you use also contribute DMG, ATK, DEF, and SPD points according to a formula for each item.
If you want to know the exact “recipes” and how many of each point the materials and Traits give, and what abilities each new form carries, they’re over on the Doll Making section of the Chart Page.
If you just want to unlock every one, and don’t care about maxing anything out, here’s a minimal and cheap set of recipes:
| Windier | Useless Fragment | Monster Feather | Rainbow Crystal | Rainbow Crystal |
| Floralite | Useless Fragment | Monster Feather | Rainbow Crystal | Rainbow Crystal |
| Magicraft | Star Powder | Monster Feather | Rainbow Crystal | Rainbow Crystal |
| Bright Soul | Failure Ash | Gold Thread | Night Crystal | Philosopher Stone |
| Zokinn | Pendegrune | Gold Thread | Hakurei Stone | Rainbow Puni Fluid |
| Bittersweet | Pendegrune | Gold Thread | Rainbow Crystal | Rainbow Puni Fluid |
| Maidress | Pendegrune | Gold thread | Shining Ore | Spirit Tears |
Random Starting Advice
Good Early Traits – Early in the game, the best Traits are hard to come by, but there are some intermediate ones that are easy to get and will carry you well for a long time. When you find Silver Potatoes in Gathering of Beasts, and buy Pious Talismans from Pamela in the Church, make sure to extract Mutated Material and Power of Faith from them, respectively. Put Mutated Material on everyone’s armor and two accessories, and put Power of Faith on everyone’s weapon and two accessories. (Or even just the accessories, since you can’t make armor and weapons for a while.) Mutated Material gives you a really respectable amount of HP Regen every turn, and Power of Faith is the only non-Effect that increases Critical Hit%. Both will serve you well for a good, long time, before they’re outclassed by end-game Traits.
Interrogate Pamela – Also, every time you visit Pamela, look at the High Class Talisman’s she sells. If you find one that is bigger than size-3, buy it. Buy however many she has that are size-4 or bigger. And do not waste them on crafting anything frivolous, save them until you are ready to use them… It’s basically impossible to make a maxed-out Victor Charm or Training Charm without a size-4 High Class Talisman, so you might as well look for one while you’re talking to her anyways, because they’re rare, and it beats sleeping for a week and then talking to her 50 times in a row later when you really want one.
Play the Piano – Every time you go to the bar, as in to check Rumors, play the piano if you care about the trophy for it. (You don’t get anything in the game for it.) Just get started with it early, it takes like 50 playings on 50 separate days for the event tree to finish. Better to do this over the course of the game than have to go back and grind it later. You’ll easily polish this off without much effort if you just do it regularly. More than once in a day doesn’t help, so just do it whenever you happen to remember and you’ll finish it before the end of the game just fine.
Early Gold – You can make Gold Threads with High Price + and Golden Radiance type Traits on them, and use them to generate themselves in a loop, and sell them for money. It’s the easiest gold-boost until you find Gold Punis out in the field. Once you do, arm up, turn the difficulty to Despair, and beat the snot out of the shiny little bastards. They give insane gold compared to every other thing in the game, by far. The best spot is in Waterside Ruins, but that’s a long ways off in the plot. However, if you run into the Rumors “Huge Puni Outbreak!?” and “Puni among puni”, they both happen in Pilgrim Road, which is the first area. Don’t “win” either Rumor, just run in and kill the gold ones, run out, and repeat, until the Rumor times out. You probably can’t beat the Admiral Puni, anyways, so stay far away from the big puni with the circle of others around it.
DLC Music – If you downloaded the free game music DLC, change the music in the Atelier, or it’ll get hella monotonous – make it a selection of several so that every time you leave and come back, it’ll cycle. You can select music from the previous games, which are going to be more complete at the beginning, because you haven’t unlocked many musics yet in this one.
Stocking Up – The well outside the Atelier has an infinite supply of pretty good water. And if you have some money to burn, stock up on Natural Oil from Marguerite. You need it for Refresh Oil at some point and you’ll burn through a lot, and there’s no good natural source for this other than her, for some reason. But don’t worry about this until you’re almost done the second screen of recipes, as the thing that needs it is on the third page.
Kicking Ass – If you’re getting your ass kicked in battle, put a few traits on your equipment. Depending on where you are in the game, you may not be able to find all the top-level Traits, but get as close as possible – you can always remake them with better ones later. Even if you can’t make weapons and armor yet, put things on accessories, and try to get decent Effects on the accessories. Also put good Traits and Effects on some Attack Items and Recovery Items. If you are up to the point where you can enhance armor and weapons, do so, it really adds up. See the Equipment section above for details. You can only choose 3 Traits for each item, so mix and match. However, remember that you can stack things that are similar: as long as they don’t combine (check the Traits Chart for that), you can have two things that raise the same stats on the same item, and you can have the same exact Trait on multiple items on the same person!
| Accessories | Weapons | Armor | Attack | Recover |
|---|---|---|---|---|
| Stat boosts, like ATK DEF Enhance, up to Well Rounded Power | Parameters+ up to Develops the Body | Critical+ up to One Hit Kill | Full of Life* | |
| Power of Faith (CRIT%+) | Power of Faith (CRIT%+) | MP Enhance up to Grand Magician’s Wisdom | Destruction+ up to Ultimate Destruction | Recovery+ up to Ultimate Recovery |
| Mutated Material (REGEN) | Absorb Damage, Over Power | Mutated Material (REGEN) | No Attribute | False Flower |
| HP Enhance, up to Full of Life* and Overflowing Life | Dragon Soul | HP Enhance, up to Full of Life* and Overflowing Life | Enhance Finisher, up to Ruthless Blow; or Trait Enhancer, up to Cost Bonus | Special Ingredient, or Secret of Health |
| Speed Enhance, up to Speed of Light | Attack Enhance, up to Power of Gods | Defense Enhance, up to Dragonscale Defense | Area/Fewer Bonus, up to Single/Multi Bonus, to focus on one target or multiple targets | |
*Note: there’s two Traits called Full of Life. Yes, they translated two to be identical, but they are not the same thing. One is a bonus to HP and only belongs on Accessories and Armor, and one cures KO and only belongs on Recovery items. Be careful.
Post Game
Once again, I don’t have a DLC or post-game section yet, but in the mean time, when I did all the late-game boss-mashing and DLC stuff, I followed everything on this page and it worked for me. This one, under Cruel Violator is also good. However, if nothing else, especially if you don’t have the DLC, just follow the small chart just above with the list of properties to add to your equipment. You do not need the grade-4 weapons – honestly, I think they’re a waste of time; also, the grade-3’s have more open crafting requirements, so you’ll get higher quality materials and stronger results. If you do that, and maximize your weapons and armor with enhancements holding reasonable traits, you’ll be able to beat everything in the game on Normal, for absolutely sure. And most rumor bosses on Despair, and at least half of all of them on Despair 5-lights.

